Wonders of Worms ~ Free Training!

Wonders of Worms ~ Spring is a wonderful time to get children digging in the soil and discovering our nearby nature. What a joy is it when a child discovers that first worm?! Something as simple as studying worms sparks children’s wonder and curiosity of nature.  Research validates that young children thrive with ample “hands on” learning opportunities. This two hour session will focus on equipping educators with ways to help extend the children’s questions and inquiries about worms, while also aligning to early learning standards!

In this two hour session we will co-create an a *rough draft* of an early childhood “Worm Unit” as a digital download. All participants will have access to print the “Worm Unit” and use with the children in your classroom!

You will hear how experienced nature based educators have moved away from thematic units and into authentic and emergent teaching practices utilizing integrated curriculum design.


Details ~ This two hour workshop is FREE! 
Date / Time: March 27, 2023 – 6-8pm EST 

To register for the free training, complete the Wonders of Worm Google Form: https://forms.gle/LWYGfz7kgkGFHScx5

NOTE: You will NOT get an immediate automatic confirmation (because I am just learning Google Forms) but I will send out Zoom links every few days so it will land in your inbox to the email you put on this form! 

  • A Zoom link will be sent to you a few days ahead of the training and in the morning of the event, so be sure to check the email you listed on the google form.
  • This session will be recorded and will be published on the April’s Teaching Tree website and YouTube channel.  
  • This session will include an interactive 20-25 minute break out room activity so please plan on having your camera and mic working for that portion of the session. 
  • Participants are encourage to bring ideas with them about how to teach about worms. You will self select the breakout room to engage in and each will focus on a different learning domain: literacy / math / gross motor / science / social emotional / and “Worm Phobic” 
  • Are you “Worm Phobic”? Does “Woes of Worms” sound like a better title than “Wonders of Worms”? Maybe you are sort of curious and also pretty sure you’ve never touched a worm in your life. I invite you to join us, and dig in to think about how to shift your mindset about worms. One of the breakout rooms will be titled “Worm Phobic” and April will spend time with this group thinking about ways to help support your children outdoors while not really identifying as a nature loving teacher! All are welcome!
  • For all my fellow Vermonters ~ I am a Master Trainer on the Northern Lights / BFIS system and I have submitted this training to count for BFIS PD hours. If you are Vermont ECE and input your BFIS number, you will be able to earn 2 hours of Professional Development that I will submit directly to Northern Lights. 

Animal Tracking with Children

C:\Users\Stan Zajko\AppData\Local\Microsoft\Windows\Temporary Internet Files\Low\Content.IE5\7B72F1W0\MC900052772[1].WMF

Animal Tracks- after a fresh snowfall, it’s so much fun to find and follow a set of animal tracks in your backyard (even cat tracks are fun to find and follow). See how far you can follow the animal tracks and try to figure out who left those tracks.Older children might enjoy drawing the tracks they find into a journal and identifying them. If you carry a digital device you could also use an app like “SEEK” to help you identify the tracks in the moment. 

Fiction Book to get your tracking started – Read the book “Tracks in the Snow” by Wong Herbert Yee about a little girl who sees tracks out of her window. A refrain in the book is wonderful to share when you go outside on your tracking adventure…. “Tracks in the snow. Tracks in the snow. Who made the tracks? Where do they go?”

Snowshoe Stomping Paths- who made this heart? As a big kid, I love to put on my own snowshoes and stomp out special messages or create paths for my preschoolers. I think it’s important to show children how much we ourselves enjoy playing outdoors all year round!

Mini World Animal Play – adding cotton batting to the indoor science area, providing small play animals, and books is a great way to extend their learning.

Photograph Tracks & Research –  Take a photograph on tracks on your hike, then print out the pictures, and look in a tracking book to find a match. One of my favorite books to have on hand in my classroom is called Tracks, Scats, and Signs by L. Dendy. Helping children to learn how to use books as a tool is wonderful life skill and children love to feel ‘grown up’. 

Follow the Footprints activity: Make animal footprints that are to scale of the actual size of the animal. (I am using Deer & Moose this year.) Before the students arrive, put the footprints out in the outdoor space. Then have the children track the prints down and follow the animal.

Flip Flop Tracks – there are lots of pins on Pinterest showing how people transform flip flops into various animal tracks. It would be fun to make these so they could be tied onto a pair of boots, then kids could stomp out their own versions of animal tracks. 

Animal Signs in Winter – Look for other signs of animal activity – nibbled twigs, chewed acorn shells, pinecones that have been shredded, scat, or scratches in bark – as we go on our winter walks we look for signs that animals have been there. There is a great one page handout in the Cultivating Joy and Wonder curriculum (on page 228) to use as a reference. 

  • Look for the ends of twigs that have been gnawed, nibbled, or snapped off
  • Look for bark that’s been gnawed or stripped off, or the the remains of nibbled nuts
  • Look for poop! Animal poop (scat) can help us identify the naimale and what it’s been eating
  • Look for animal homes (squirrel leaf nests, holes in trees, dead logs) 

https://shelburnefarms.org/our-work/resources/cultivatingjoyandwonder

Winter Track Walk Data Collection: Taking a winter walk in the forest looking for animal tracks can be quite the adventure for young children. Explain that in addition to tracks people also look for tree scarring and scat (animal droppings). Look for real animal tracks and other signs that animals have been there. Help the children learn how to approach the tracks slowly without disturbing the tracks so all their friends can see before we make our own tracks over top of them. Over time continue to take photographs of the tracks so that you can print and make a classbook of your discoveries. Who are the frequent animal visitors in your area? Make tally marks or some other data collection so you can see who are the most frequent visitors. 


Animal Track Pattern Cards – give each child their own ‘Animal Track Pattern Cards’ to wear as a necklace. Help children learn the four categories of animal movement (straight walker, hopper, waddler, bounder) and test it out with your own body. I like to start with teaching about the “hoppers” and pretend we are snowshoe hares. When children feel this movement in their body it is easier to understand how different animals move. This makes for a great gross motor game to play! You can get a free printable “Track Patterns” from the Shelburne Farms Cultivating Joy and Wonder book on page 221 – https://shelburnefarms.org/our-work/resources/cultivatingjoyandwonder

Looking for a few more curriculum ideas? Check out these three elated lessons from the Cultivating Joy and Wonder book from Shelburne Farms: 

“Active in Winter! Animals on the Move” p.102-103 (115-116)

“Signs in the Snow” p.106-107 (119-120)

“Owl Eyes” p.131-132 (144-145)

Make a cast of a track in MUD – directions at this youtube video with plaster https://www.youtube.com/watch?v=A_ksi4Ih_wU&t=54s

Small Scale Track Making : Bring a few plastic toy animals outdoors. Show the kids how they can make the animals walk through the snow leaving behind mini tracks. Tracks can also be made with toy vehicles. Play a version of hide and seek where children make tracks with toys and another child goes to look for where they end & find the toy. Tracking Basket: in the outdoor classroom, display an animal track identification poster on the fence or wall. Keep a small tracking manual or plastic tracking cards available for the kids to explore. Animal Tracks matching cards could be laminated and kept on a ring. One set that is very preschool age appropriate (though the tracks are not to scaled) is at PreKinders. This link takes you to a  *FREE*  printable animal track book with predictable text “This is a raccoon track.” with color pictures and clip art of the track. There is also a set of animal photos and track cards that can be printed out and made into a matching game. https://www.prekinders.com/animal-tracks-book/

Children’s Booklist for Animal Tracks:

Arnosky, Jim. Wild Tracks!  (This is a wonderful book with amazing fold out pages of life sized tracks)
Arnosky, Jim. I See Animals Hiding.
Benjamin, Cynthia and Jacqueline Rogers. Footprints in the Snow. (This is an easy reader book that is often found as a $1 book through Scholastic Book Club.)

Dendy, L. Tracks, Scats, and Signs. (Favorite reference book to keep in my backpack to use to identify animal tracks and scat.)
Dodd, Anne Wescott. Footprints and Shadows.
Dorros, Arthur. Animal Tracks.
George, Lindsay Barret. In the Snow: Who’s Been Here?
George, Lindsay Barret. In the Woods: Who’s Been Here?
Hulbert, Laura. Who Has These Feet?

Hodgkins, F. Who’s Been Here? A Tale in Tracks. (includes tracks from: cat, turkey, moose, skunk)
Jones, Jennifer. Who Lives in the Snow?
Judge, Lita. Red Sled

Levine, Lynn and Martha Mitchell. Mammal Tracks and Scat: Life-Size Tracking Guide (Another great reference book with actual size tracks that make it easier for children to identify.)

Miller, Dorcas. Track Finder: A Guide to Mammal Tracks of Eastern North America.
Selsam, Millicent E. Big Tracks, Little Tracks: Following Animal Prints
Sams, Laura. Stranger in the Woods – Photographic Fantasy.
Lawlor, Elizabeth P. Discover Nature in Winter (Discover Nature Series)
Stall, Chris and Steve Whitney. New England Animal Tracks.
Wilson, Karma & Jack E. Davis. Moose Tracks!

Yee, Wong Herbert. Tracks in the Snow. (A great story to introduce young children to tracking. A girl follows tracks around her home and discovers that they are her own tracks from the previous day.)

Ice Lanterns ~ Arctic Temperature Fun!

One of the realities of life in northern Vermont that winter brings us extreme low temperatures. Rather than deny it or bemoan it, I suggest that we embrace it!

When I know that we are going to have a Arctic like temperatures I like to seize the opportunity to make: ice lanterns, ice balls, and other icy explorations for my preschoolers. This post is a round up of pictures to inspire you to try your own hand at making the most of the frigid temperatures!

ICE LANTERNS – gather up large plastic containers and fill with water to freeze, add some natural materials like pine boughs. When frozen solid, put on eye protections chip a little indent with a screwdriver and insert tea lights or small candles. Some sources suggest using two different containers one inside the other, but my method makes a really solid lantern that will last a LONG time! I use mine outdoors and love the glow amongst the dark night!

Create a whole display with multiple ice lanterns and adorn them with icicles. After dark the icicles glow as the shadows of the candles dance!
Ice Balls ~ these are great fun to make with children. If you want more perfect spheres, fill the balloon with water and then set inside a similar sized plastic bowl. If you lie them flat like here they don’t roll as well…and you definitely want to try rolling these for a bowling game or with ramps!

As the lanterns are used the crevice becomes deeper. You can try adding more water on another frigid night so that it will last longer. The ice lanterns I made in 2021 lasted for almost 2 months!

Ice Sun Catchers – using small shallow pans try creating sun catchers with natural materials. Children love to create these and then once frozen…deconstruct them. Just remember eye protection when chipping or smashing ice.
Ice Sculpture – go big or go home! Grab all the buckets and containers you can find and make a entire palace out of ice. I saw took this photo years ago as I was driving home from southern Vermont. The family had created an ice rink and also had this inspiring colorful ice sculpture display!
Ice Hunting – I have an ongoing project to find the largest icicle that I can. While hiking the Rail Trail in December we found some beauties but these are tiny compared to last years 5 footers!
Bundle up ~ invest in a Balaclava!

No exposed skin is the way to survive (and even thrive) in the frigid temperatures. It turns out that with layering and getting out of the wind, you can still get outside even when an Arctic blast rolls through! I shared this rather unflattering photo on Instagram recently with the caption: “Question: What would you do to spend some quality time with your teenage son? Answer: Travel to the planet Hoth for some ice fishing while hoping that a Tauntaun might come offer a warm spot to defrost! “

Unlike Elsa who said, “Let the storm rage on. The cold never bothered me anyway.”…many of us just are NOT comfortable being outdoors in the cold. In one of my recent trainings, “Nurtured by Nature: Winter Wellness” I shared some of my tips for staying warm outdoors.

Staying Warm Strategies:

  • Get the right gear & wear layers. Not sure what to buy ~ borrow gear from friends to test out & talk to others. Outdoor stores are happy to talk about options to keep you warm. You don’t have to break the bank when you learn how to layer. (which is a post for another day)
  • Try going outdoors for shorter lengths of time
  • Be active while outdoors – keep moving and PLAY!
  • Go out at the warmest part of the day
  • Avoid windy areas 
  • No exposed skin — get yourself a Balaclava type mask which is made of stretchy, breathable fabric that protects your face while wicking away moisture. Function before fashion!
  • HYDRATED before going out
  • Consider using toe or hand warmers 
  • If the cold really bothers you…invest in heated gloves, socks, vest, or jacket! It’s not a sign of weakness but rather a strategy that might motivate you to go outdoors more often this winter!  

Additional blog posts for winter ideas:

Winter Science for Preschool – https://aprilsteachingtree.com/2020/12/18/winter-science-for-preschool/

Winter Inspired Math Activities – https://aprilsteachingtree.com/2020/12/21/winter-inspired-math-activities/

Children’s Books for a Winter Study Unit – https://aprilsteachingtree.com/2017/11/15/childrens-books-for-winter-studies/

Snowflake Catching Necklaces – https://aprilsteachingtree.com/2017/01/19/snowflake-catching-necklaces/

Upcoming Training ~ “Nurtured by Nature: Winter Self Care”

Sponsor: Northern Lights at CCV

Instructor: April Zajko

With shorter daylight hours and frigid weather you might find yourself ready to hibernate. This two-hour training will give you a toolkit of simple wellness and gentle self-care strategies to integrate into your daily routines. You will learn ways that nature can gently nurture you and help you feel invigorated throughout the winter months!

Winter Inspired Math Activities

Counting Practice Counting how many steps to get outside, counting how many sleds, counting the number snow trucks, …counting just about anything that we see!

Counting Tracks Notice tracks in the snow and see if you can count how many steps the animal took to get from one place to the other. Compare the steps for children and the adult. 

Magic Number = Counting Sets “Today our ‘magic number is ___. Help me count everyone in line before we go outside to make sure we have our magic number!” (The magic number is the number of children who are here today and is an embedded counting routine we do several times a day. Try writing the numeral down to work on number recognition as well.  

Sled Count “1-2-3 blast off”- count up to three before the sled riders get their push down the hill. Practice counting higher up to 10 if they are patient enough! Or try counting backwards 3-2-1!

Snowman Features – Practice counting groups by counting the number of buttons, eyes, mouth pieces, etc. 

Snowball Fractions- Create several large snowballs and practice cutting them into ‘fair shares’ – talk about halves, quarters, and fourths! Make a ‘snow cake’ by using a large plastic tote as a mold and cut it into enough pieces to serve to every child! Count how many kids there are and then count to make sure there is enough for each child!

Snowball Groups – Create two different groups of snowballs – compare which looks like there is more. Count and discuss 

Painting Numerals in the Snow

Tracking & Position Words – Even if the only ‘tracks’ on your playground are the neighbor’s cat or squirrels children will love to follow them and describe what the animal was doing. Ask leading questions that get the children to use spatial words. 

Sledding Conversation  Make sure the rope is inside the sled or it will slow your ride down. Both friends need their hands on top of the sled so our fingers don’t get pinched. Put your legs around the person in front. When you get down the hill move to the side of where we sled so no one bumps into you. Pull the sled up to the top of the hill. 

Stick Shapes – explore building 2D shapes by offering a collection of sticks of various sizes. Squares, rectangles, triangles…as well as coming up with creative designs. Read the book, “Not a Stick”!

Shape Stamps – explore making 2D shapes by bringing out different shapes that you cut out of cardboard. Children can push the cut out into the snow to make designs or pictures. 

3D Snow Shapes & Sculptures- explore making 3D shapes by making snowballs (spheres) and using plastic molds in different shapes. Orange juice container cut into smaller square (cubes); snow brick makers (rectangular prism), and 5 gallon food buckets (cylinder).

Measuring Snow – Set up a “Snow Measurement Board” by getting a 24×24 inch of exterior grade plywood. Have the children help you paint the plywood on both sides and edges with exterior white paint. Purchase a Measuring Stick that has easy to read numbers. Take a reading each day for total snow, and if you clear one half of the board each day you can measure ‘new snow’. Read more at this link for specific directions or just have fun exploring measurement when you think about it. 

https://www.weather.gov/dvn/snowmeasure

Measuring Snowmen – Create a snow family of different heights then compare and contrast the different sizes. Try measuring them using a tape measure or non-standard unit such as Yarn. Read the book, Snowballs by Lois Ehlert. 

Measuring Snow Angels 

Have several children lie down near each other to make Snow Angels. Afterwards talk about the different sizes and compare sizes of each child’s snow angel. 

Walking Stick – Measuring – A walking stick can be a great non-standard unit of measurement. Create several different length walking sticks and use them to measure things in the outdoor classroom. 

Measuring Icicles – children love to examine and investigate icicles. Talk about whether the icicles are short or long; narrow or wide; heavy or light. Make predictions about which one will take the shortest amount of time to melt and which one will take the longest time to melt. Photograph the icicles next to a ruler and compare every hour with a new photo. How does it change over time outside vs. inside?

Recipes in Snow Kitchen – children can explore measurement by adding plastic measuring cups and measuring spoons to the ‘snow kitchen’. Add various sized bowls or containers for scooping and pouring and packing…all great ways to explore volume with snow!

Snow Volume – have children fill up a variety of containers with snow. Pack the snow in tightly and look how full it is. When you go indoors take the filled containers with you and watch the snow melt. Compare how much water is left once fully melted. 

Patterns in the Snow – Use two different types of natural materials and create an AB pattern (such as pinecone, stick, pinecone, stick…). Have children help figure out what comes next and practice extending the pattern. 

Pattern Making with Snowballs & Snow Molds – Use two or more different containers that can be used as a molds – create a pattern such as Snowball, Yogurt container, Snowball, Yogurt container…

Seeds, seeds, seeds

As spring begins to arrive we start to think about sprouting seeds and begin dreaming of our gardens. There are countless different ways for us to explore, examine, investigate, germinate, and even feast on seeds. Here is just a sampling of the seed investigations that I have offered, throughout the year, in the preschool programs I have taught in.

Some of favorite seed investigations include:

Seed Exploration Bin – add a variety of seeds or dry beans for closer observation and exploration. Larger seeds such as sunflower, wheat, peas, corn, pumpkin, and beans are great for sensory bins. If you have a large collection of seeds, put them into a bin so kids can scoop, sort, and pour.

Seed Exploration Trays – If you have a small amount of seeds, use trays with bowls.Try saving seeds pods from nature to explore as a cost free alternative. I keep a metal cookie tin in my science center with a nice variety of seeds for children to explore.

“Ziploc Greenhouse & Bean Seeds” – soak beans overnight. Decorate their own greenhouse sheet. Child moistens a paper towel and folds & lays it in the bottom of their Ziploc baggie. Place 3-4 bean seeds onto the towel and partly close the bag. Tape bag to the greenhouse and hang in window. Observe the greenhouse each day and record on “My Observation Log” sheet. (Note: if your classroom windows are cold because of outdoor freezing temperatures, do not hang them in the window because the germination will slow or not sprout at all.) Free printable here: http://kindergartencrayons.blogspot.com/2013/04/growing-beans-like-jack-did-freebie-fun.html


Greenhouse – small collapsible ‘greenhouses’ can be purchased such as this one pictured on the right. This mini four shelf unit with a plastic zippered covering was sold at our local Ocean State Job Lots for only $20. This allowed me to grow a larger number of seeds so we could have seedlings both for our school garden and for children to take home seedlings!

Seed Trays Indoors – children delight in seeing multiple types of seeds sprouting next to each other in a tray. It is fun to do daily observations of the sprouts to compare growth, color, texture, and germination rates! If you have access to a grow light and warming seed mat the seeds will grow stronger, but even a sunny window is enough for our young scientists

Seed and Plant Matching – print the matching cards from http://www.montessoriprintshop.com/Free_Montessori_Downloads.html

Have small containers of the nine types of seeds. Display the seeds with the matching cards – Sunflower, Pumpkin, Sesame, Flax, Fennel, Cumin, Poppy, Pomegranate, and Mustard. Children love this matching game!


 “Our Seed Book” – this site has 4 different printable covers and detailed directions here http://www.prekinders.com/2012/04/make-a-seed-book/   This Ziploc bag book is made with empty seed packets and real seeds. It’s great to compare the sizes, colors, and shapes of seeds.


Examining Seeds – open several seed packets and compare the size, color, and shape of the seeds! Children are often surprised to find out that some seeds have a scent, which is easiest to detect with herb seeds.

Seed Sprouting Necklaces – moisten a cotton ball and put it inside a mini jeweler’s Ziploc bag. Add a seed and close the bag. Poke a hole in the top of the bag and add a yarn or hemp necklace. Make the length of the necklace so it fall where the child’s heart is ~ the warmth of their heart will help the sprout grow. After the roots and first leaves appear, transplant into a small pot and then later into the garden when it’s warm.

Surprise Garden –let children choose from 6-8 different types of seeds, they plant their own container. Let them sprout at school, then send home. Send a list of plants that might be included in the garden.

Sprouting in a Jar – a fun year-round activity is to grow sprouts in mason jars. Start them on Monday and by the end of the week the children can feast on a fresh batch of sprouts!

Finding the Seeds– bring in a variety of fresh fruits and veggies. Cut them open and have the kids help you find where the seeds are located. Scoop and spread out the seeds to dry. These can be planted (though some may not sprout) and others could be used in art projects.  Also try finding seeds in other foods we eat….such as delicious local bagels!

No sun. No soil. No Water. Experiment-take three Ziploc bags and write one sentence on each. One another bag add a small amount of dirt, some water, and three bean seeds. In each other the other bags add three bean seeds and do whatever the sentence says. (ex. the ‘no sun’ bag add the beans, dirt, and water but hide it in a shady place) Observe the bags for a couple of weeks and discuss the results.

Harvesting Seeds – look around outdoors for dry seed pods either from the garden or the wild garden in the forest. Lupine is one type of seeds that are easy for little hands to harvest and then can spread the native species seeds on the edges of the school yard!

Exotic Fruit – children develop their palette in early childhood…so why not bring in unusual and exotic fruits. Try to see how different seeds look in fruits from other parts of the world.

Seeds & Balance Scales- another way to explore seeds to weigh and compare them using balance scales

Grass Heads – this project helps children see how grass or wheat grows. First decorate small clear cups with wiggly eyes and construction paper glued on. (The clear cups let children see the roots, but small pots could also be used.) After the faces are dry, add a small amount of rocks in the bottom of the cup for drainage. Then add potting soil leaving ½ an inch from the top of the cup. Finally add the wheat seeds. Moisten the soil and mist once a day until it sprouts. Show kids how to give their ‘Grass Head’ a haircut.

So many engaging ways to explore seeds….all while dreaming of the days when the garden is in bloom again!

Books about Seeds:

A Fruit is a Suitcase for Seeds by J. Richards

A Seed is Sleepy by D. H. Aston

From Seed to Plant by Allan Fowler

From Seed to Pumpkin by W. Pfeffer

How a Seed Grows by H. Jordan

I’m a Seed by J. Marzollo (compares pumpkin to marigolds)

Just a Seed by W. Blaxland

Oh Say Can You Seed? All About Flowering Plants by B. Worth

One Little Seed by E. Greenstein

Seeds Like These by Paki Carter

Spring is Here! A Story About Seeds by Joan Holub

The Carrot Seed by R. Krauss

The Surprise Garden by Zoe Hall

The Tiny Seed by Eric Carle

We Plant a Seed (Troll First Start Science)

Snowflake Catching Necklaces

img_0609

I had this brainstorm a few years ago when I was outside with my son. We were trying to catch snowflakes on black felt and black construction paper but they kept bending in half and blowing in the wind. My son had his mittens on so he was even more frustrated by not being able to hold the paper well.

That’s when it hit me, I need to make some “Snowflake Catching Necklaces”!

I wanted something that could hang around his neck so when he lost interest it could just hang there. I also wanted it to be firm enough that it wouldn’t fold or bend. I decided an old CD with a ribbon attached could fit this purpose.

To make them I covered one side with dark colored felt. The felt works well because it’s fuzzy texture kind of makes the snowflakes stand up so you can view it from multiple angles. I also made sure that the ribbon was long enough to easily fit over a hood or hat since these will be used while we have our big winter coats on.

For the reverse side of the snowflake catchers I have made a couple of different versions:
* For some I added a felt pocket where a magnifying glass could be stored. To make it more portable, I attached a plastic magnifying glass onto another ribbon so it would all stay together. (This option proved a little hard for 3 year olds to operate though.)
* Another idea was to draw a few types of common snowflakes to use as a quick reference.
* My favorite choice for preschoolers is to the leave the back side blank so they have a “mirror”. They like to check themselves, especially if they are trying to catch falling snowflakes on their tongues! This mirror would also be fun to show them how to make reflections with the sun and send an S.O.S. message!

Class set for my preschoolers…now if only we could have a nice snowfall!

Happy Snowflake Catching! Be sure to look up the life story of Snowflake Bentley, whose passion was catching and photographing snowflakes!

I also have a great Pinterest board of fun ideas to do outdoors in winter!

Save

Sensory Exploration: Touch

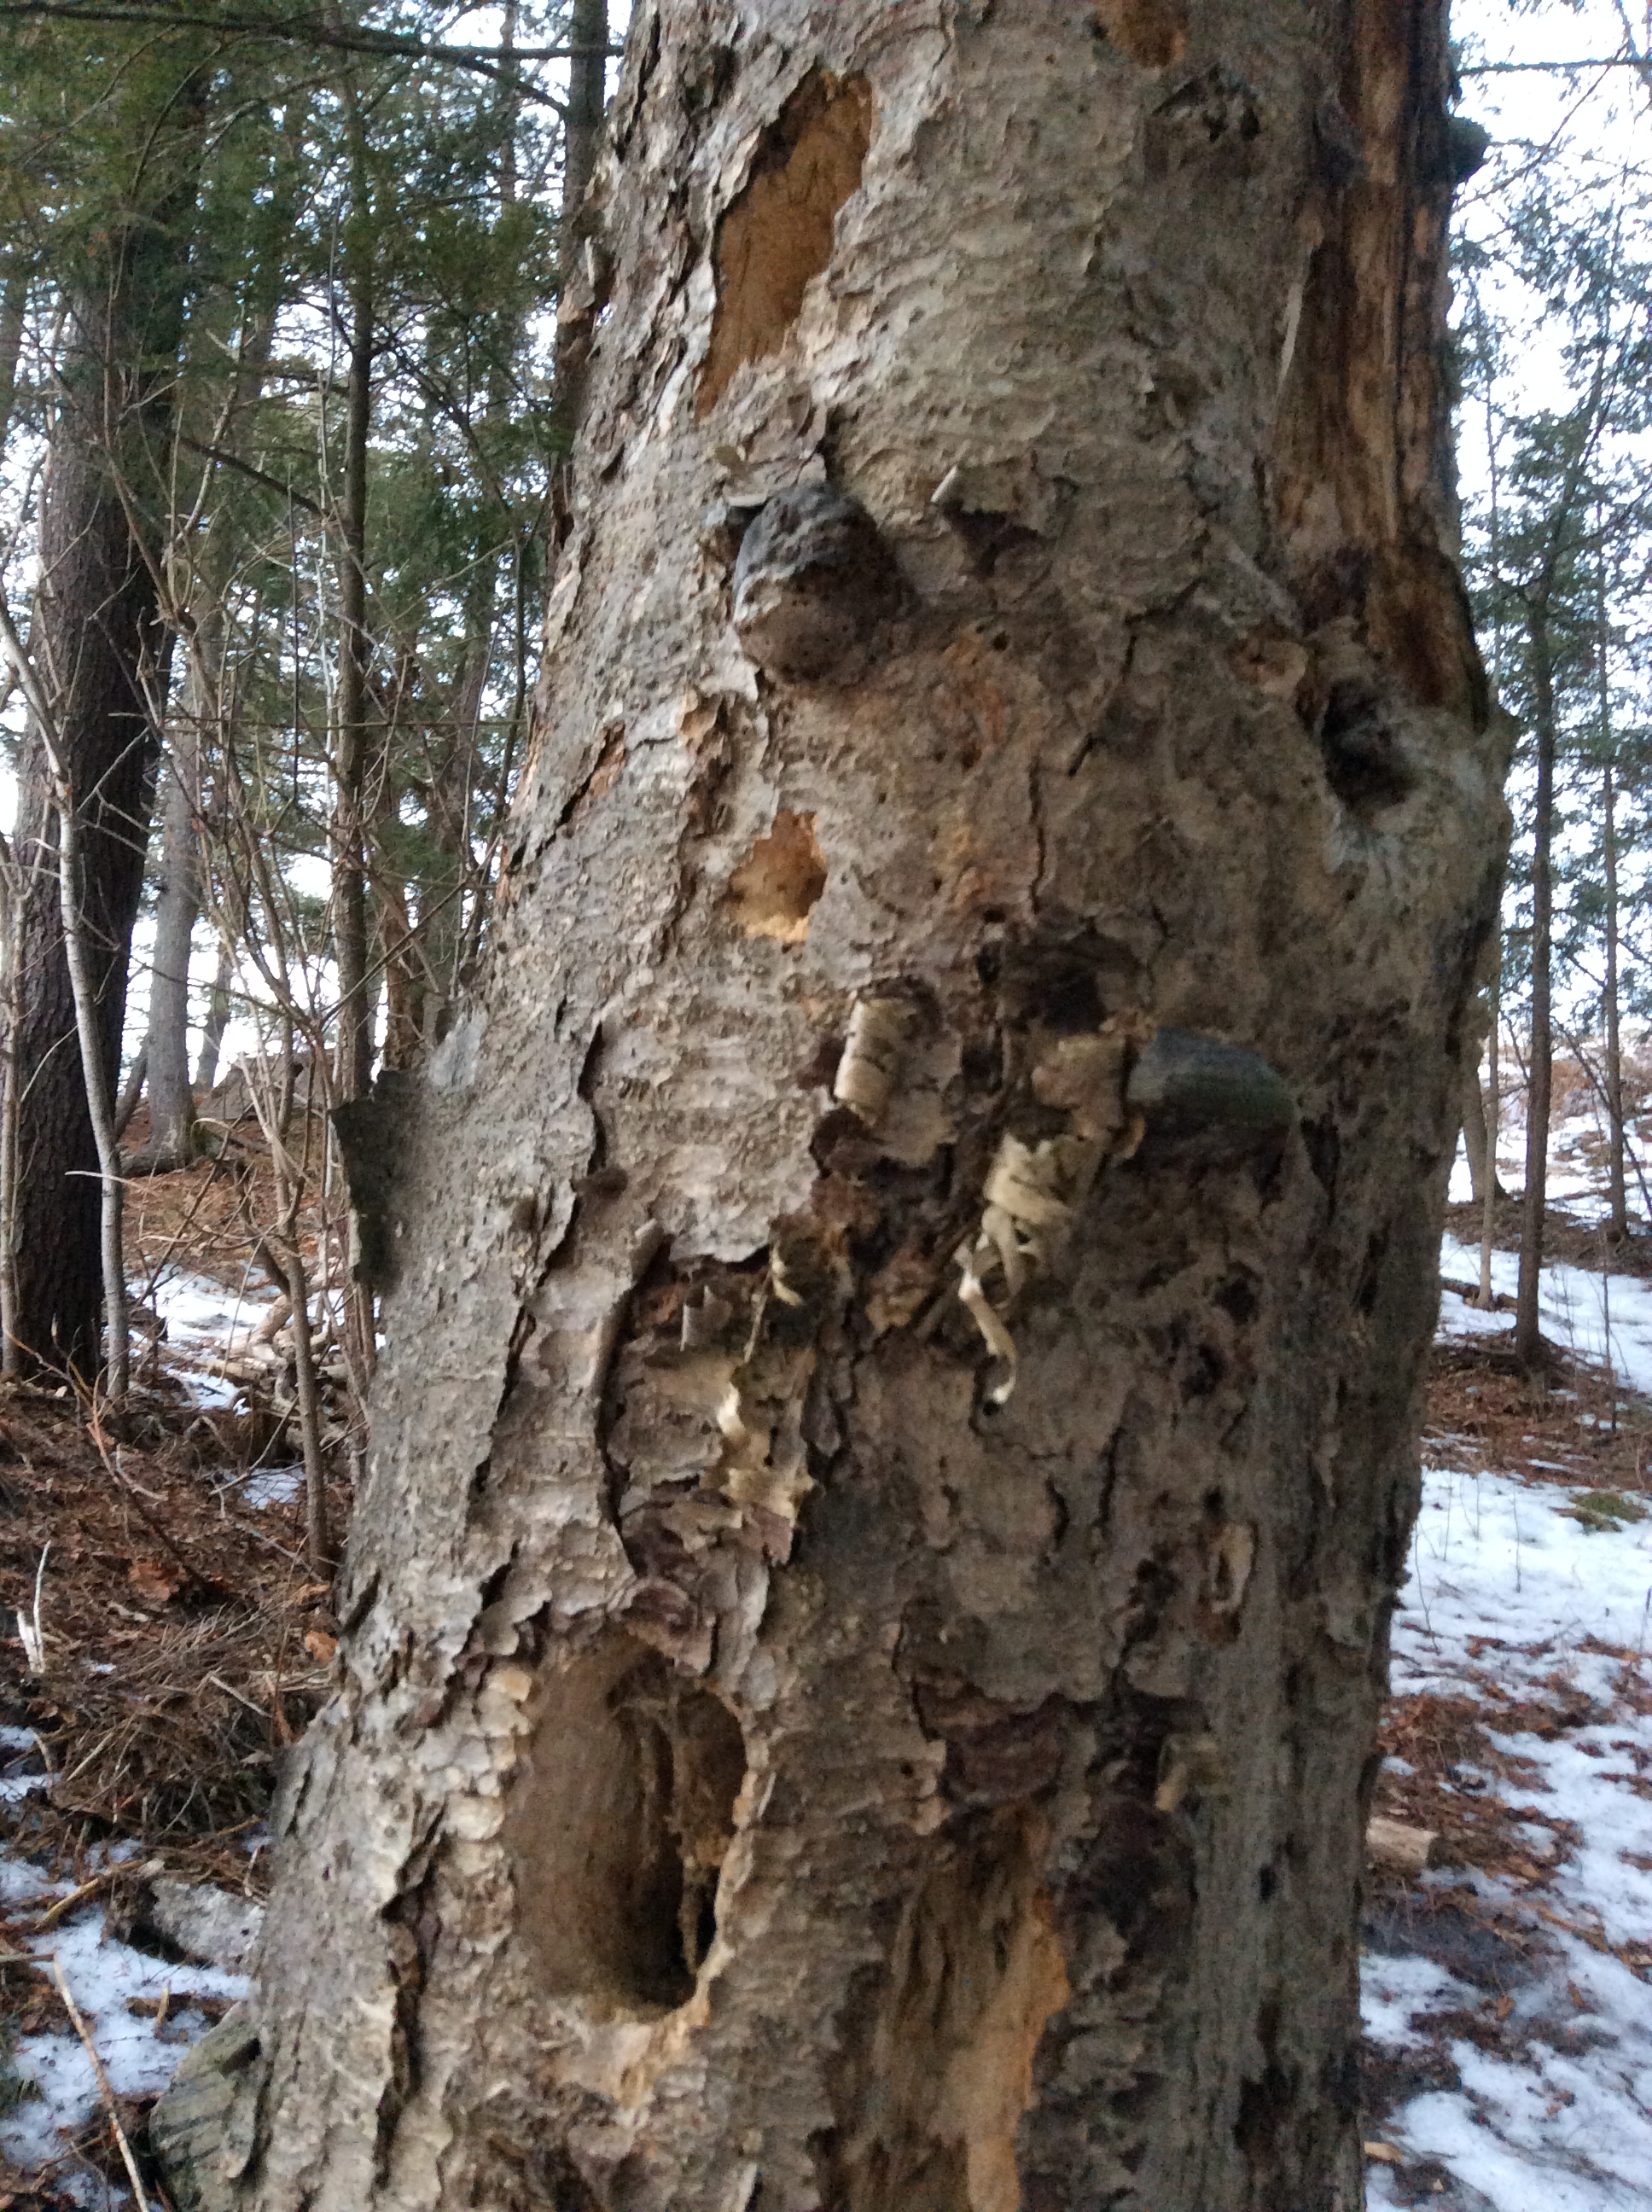
Outdoor Discovery Time– I love connecting what we are learning to meaningful and real experiences outdoors. So when learning about the sense of touch, I love to my children on a “Finding Textures Walk”. In fact, I feel like I can relate most things that I am teaching about to a nature walk. What is fun about nature walks is there is always something new to discover, and it take no ‘prep work’ on the teacher’s part. Do our walks fail sometimes? Absolutely, but isn’t failing also a great life lesson?

For our “Finding Textures Walk” we used our hands to explore different objects in our surroundings. The language and expressions that children come up with for different objects is inspiring and humorous. Recording the children’s dialogue while they are exploring, and then revisiting that dialogue back at a group meeting is a wonderful way to reflect on their experiences.

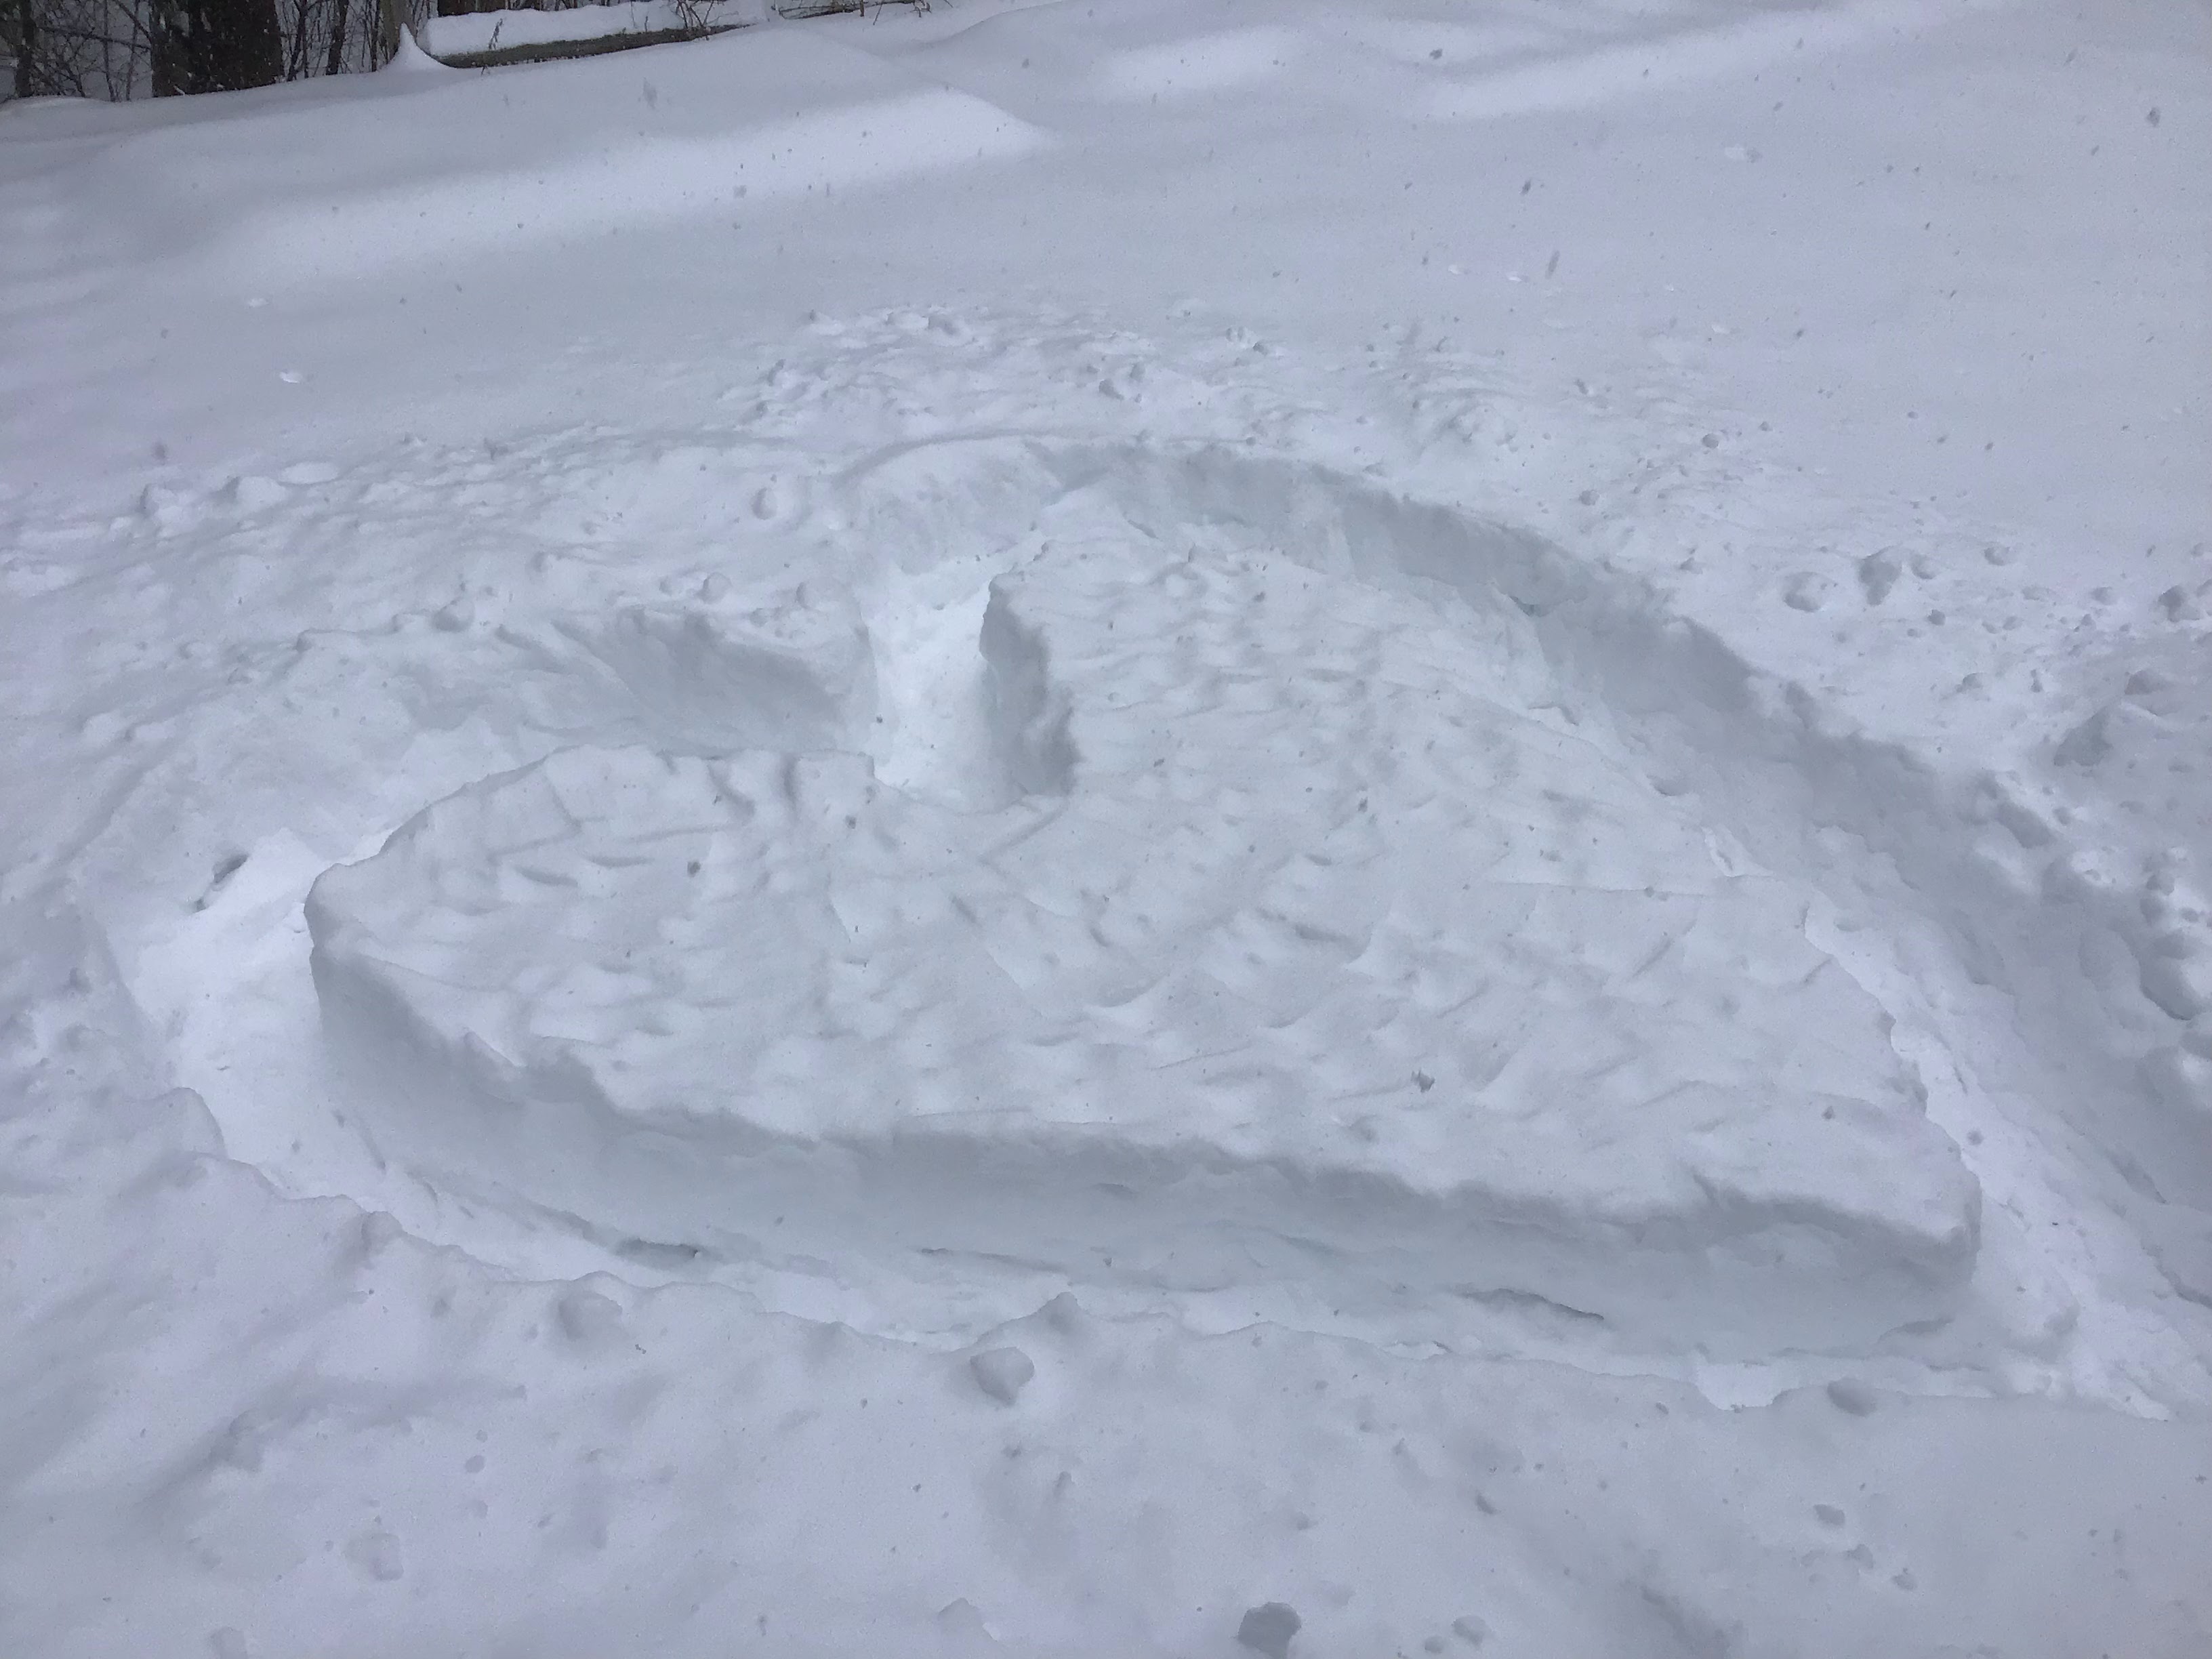
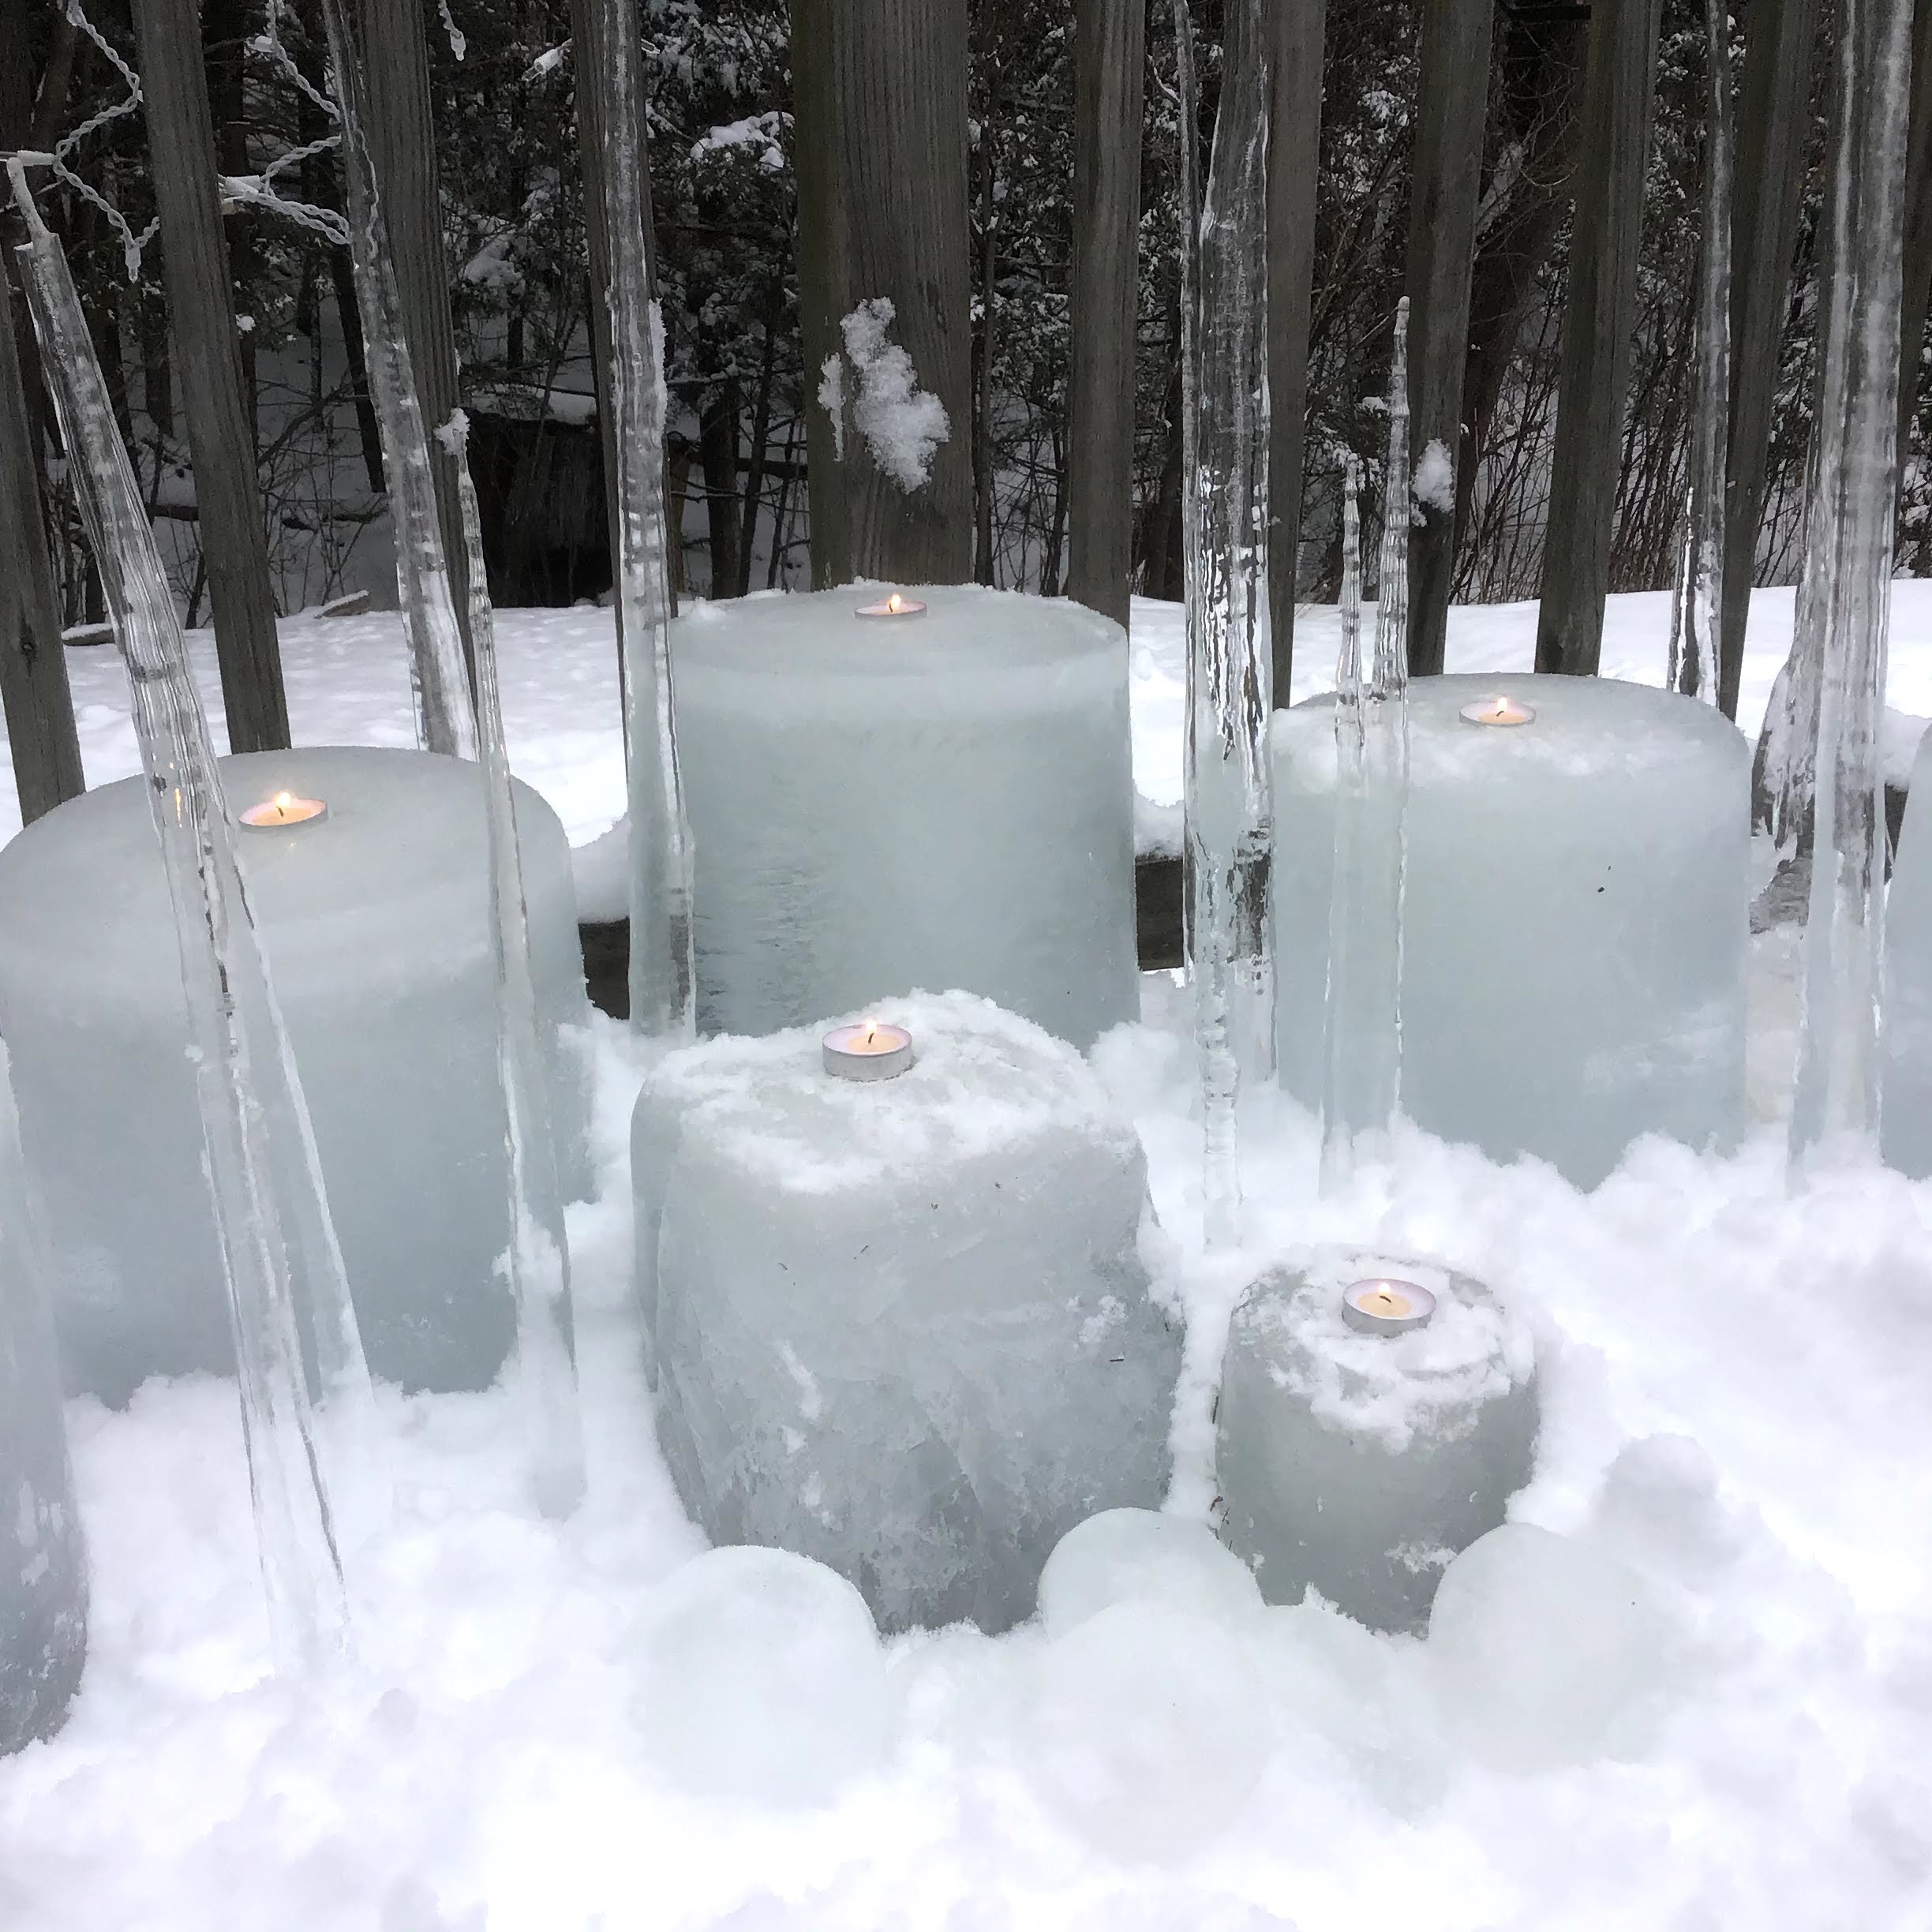
What might you find on a texture walk? Crunchy snow, slick ice, sticky pine cones, rough and bumpy bark, smooth and paper-like bark, prickly pine needs, thorny bushes, cold hard rocks, and the list is endless.

Ask your children…can you find something smooth? rough? hard? soft? bumpy? cold?


Gross Motor Activities

Sensory Obstacle Course: whether indoors or outside, you can set up an obstacle course that features many different types of textures. Spend time looking at the outdoor play toys to find a variety of materials to include. Ideas might include: hard stepping stone, nubby texture balls, squishy foam ball, lightweight scarves, bouncy playground balls, heavy medicine ball, coarse surface on the step aerobics step, smooth wooden balance beam, bouncy trampoline, soft pillows, dense gym mats, spinning sit and spin, wobbly balance board, hard river stone steps, and the list goes on.

Parachute Play: A fun way to explore the sense of touch is to put different types of materials onto the parachute to see how they react to our shaking them: foam balls vs plastic squish ball, juggling scarves, bean bags, plastic golf balls, ping pong balls, etc

Tag: We need our sense of touch in order to play tag. With preschoolers, I find tag is much more fun if there is a way to become un-frozen so that play can continue.

Princess and the Pea: gather up a bunch of pillows and a small firm ball and play a version the classic fairy tale. Many children are not familiar with this tale, so be sure to read a version or two before trying to play the game!

Dramatic Play

Add a wide variety of dress up clothes made of different materials. Prior to putting the new clothes at the center, explore the materials at circle time and discuss how they feel. I especially like to include ethnic clothes such as a silky kimono, woven Guatemalan skirts, or a wool vest.

Science Center

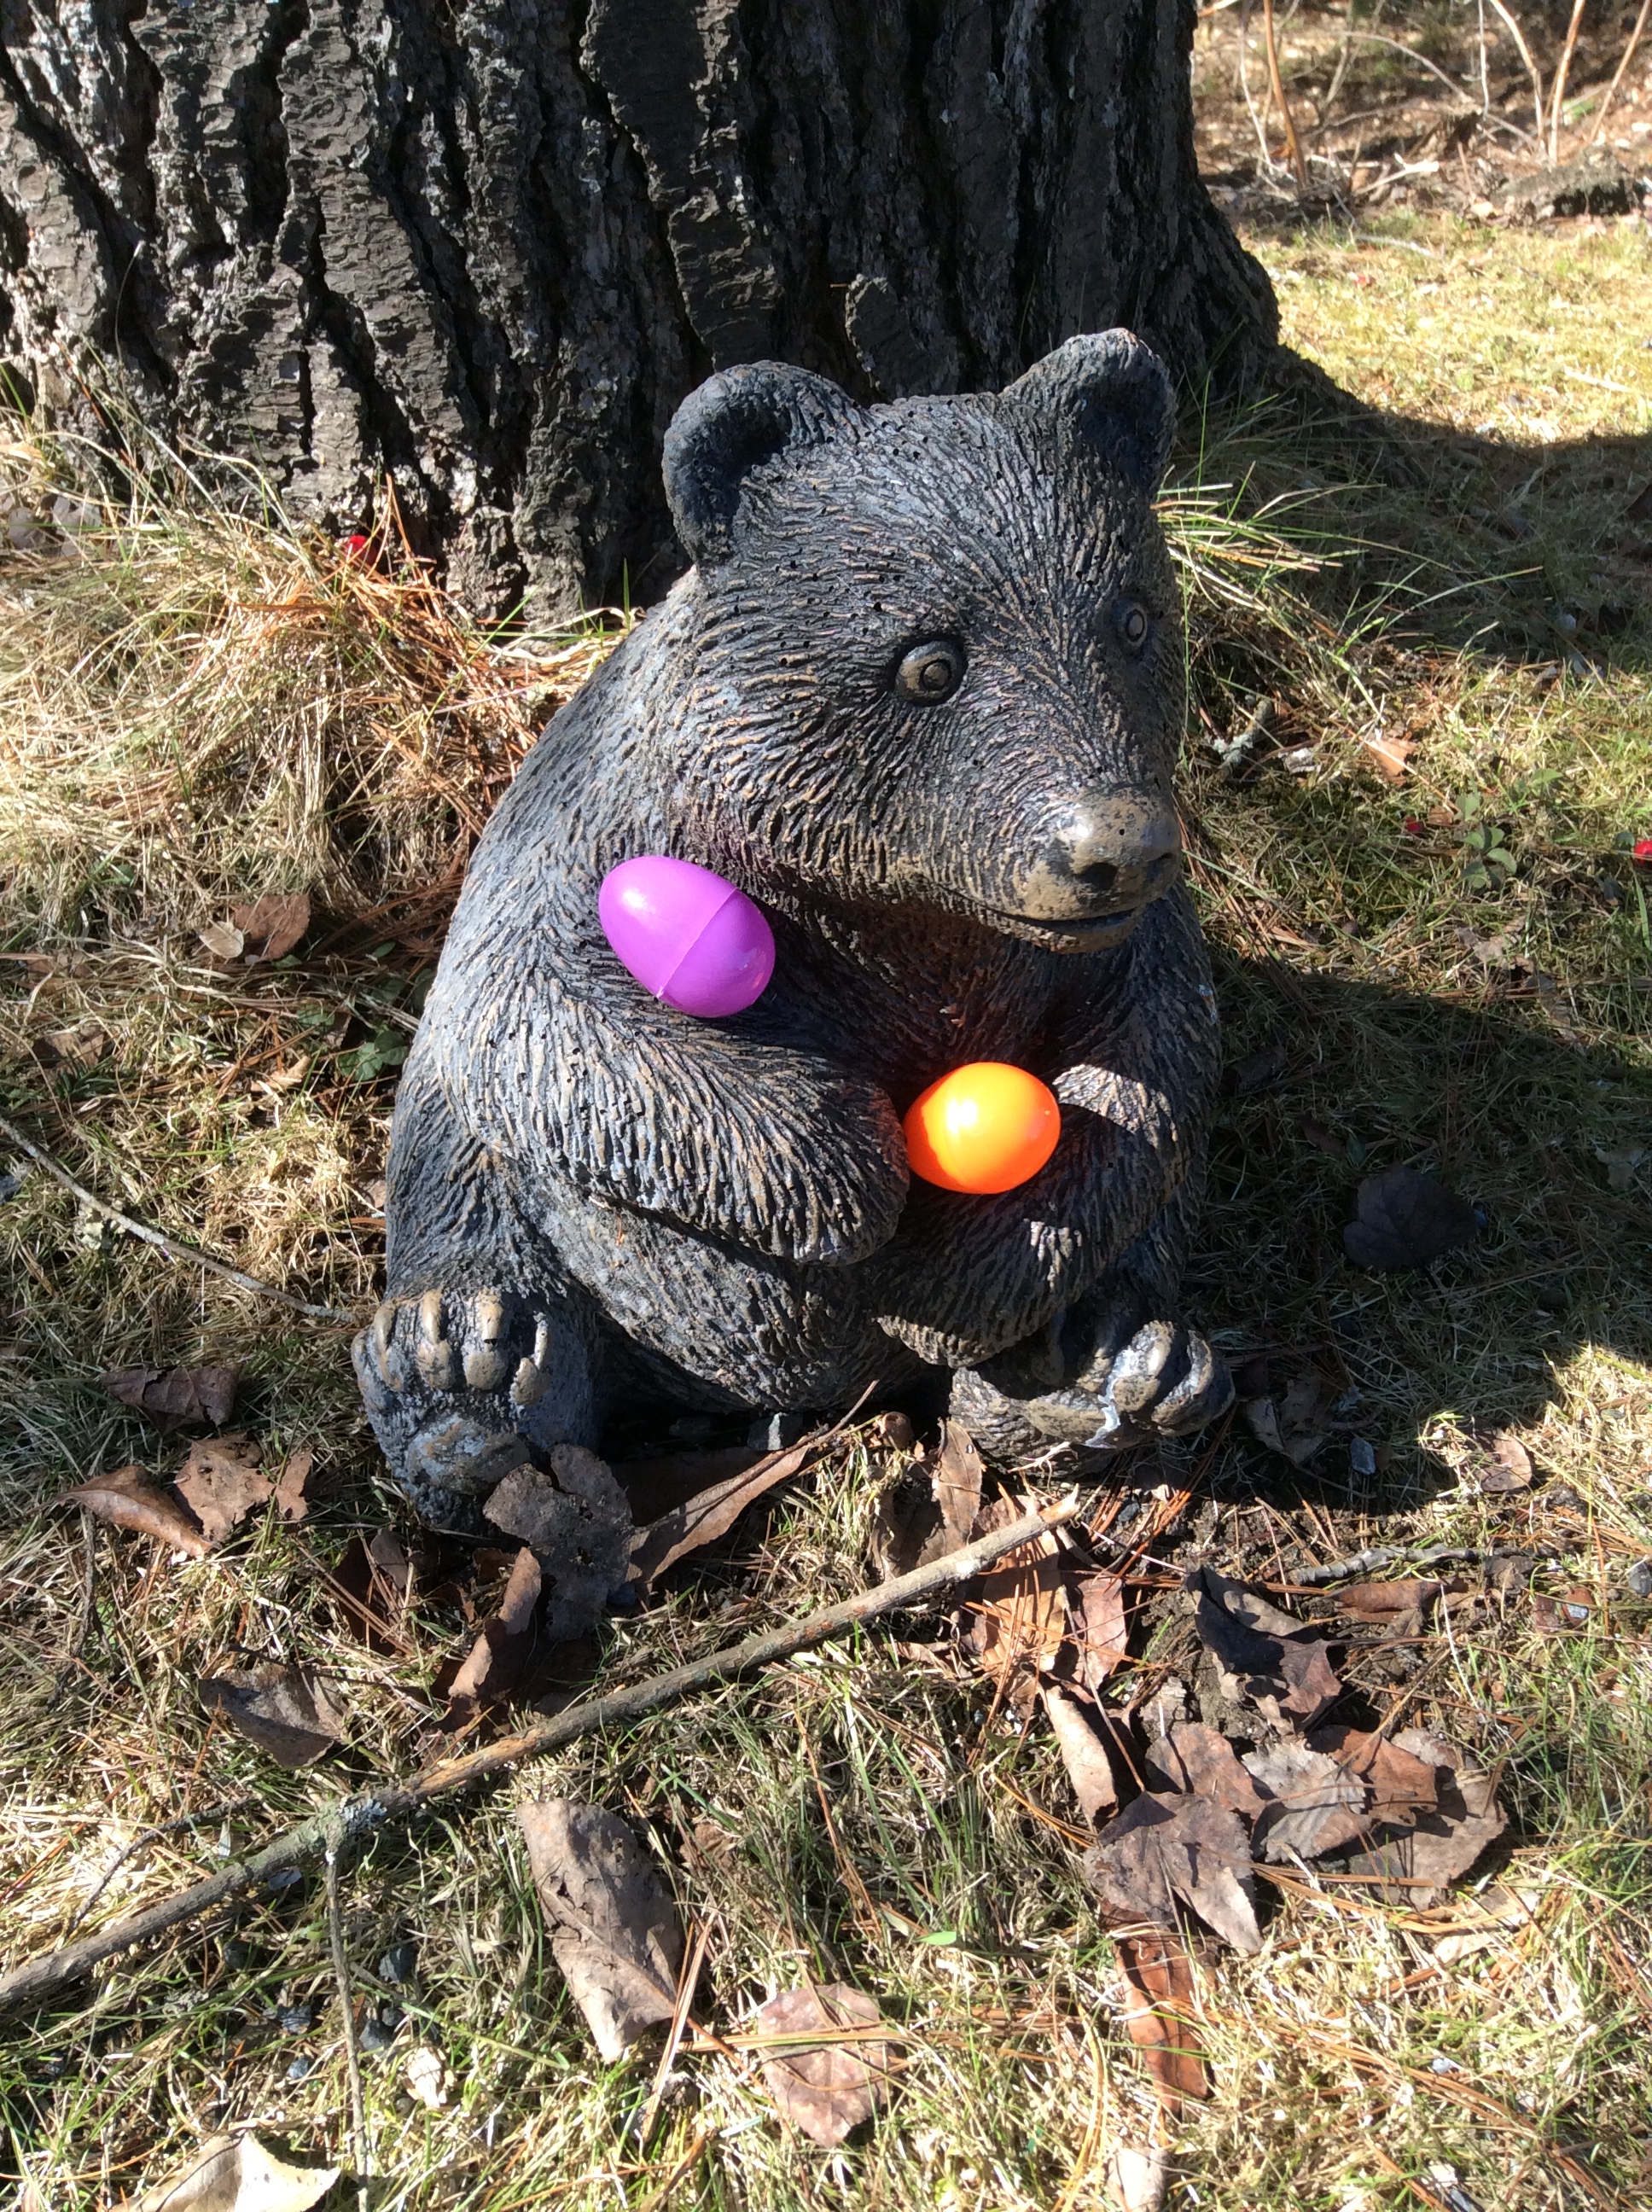
Explore Textures with Natural Materials: gather a variety of materials for children to explore. Acorns, bark, branches, feathers, flowers, horsetail, leaves, seeds, pods, pebbles, pine needles, pinecones, shells, spiky burdock burrs, and small tree cookies. Sweet gum balls are not native to my area, but I have a small collection that we gathered on a trip. My students are fascinated by them since they have never seen them before and they are so spiky.

I also have a great collection of pine cones from the teeny tiny Hemlock cones to a gigantic cone that a Grandma in my program donated years ago. Kids are amazed at how different the pinecones can be, and often are inspired to start their own collections.

Fabric Texture Match Ups: Cut out two swatches from a variety of fabrics. Children can practice matching the fabric swatches. Then provide a blindfold and have the children match with only their sense of touch.

Texture Collage Board: Send home a note explaining that we are learning about textures and invite parents to help their child to glue a bunch of the same items to the cardboard piece enclosed. Once the collage boards are returned, keep them at the science center for children to explore.


Language and Literacy

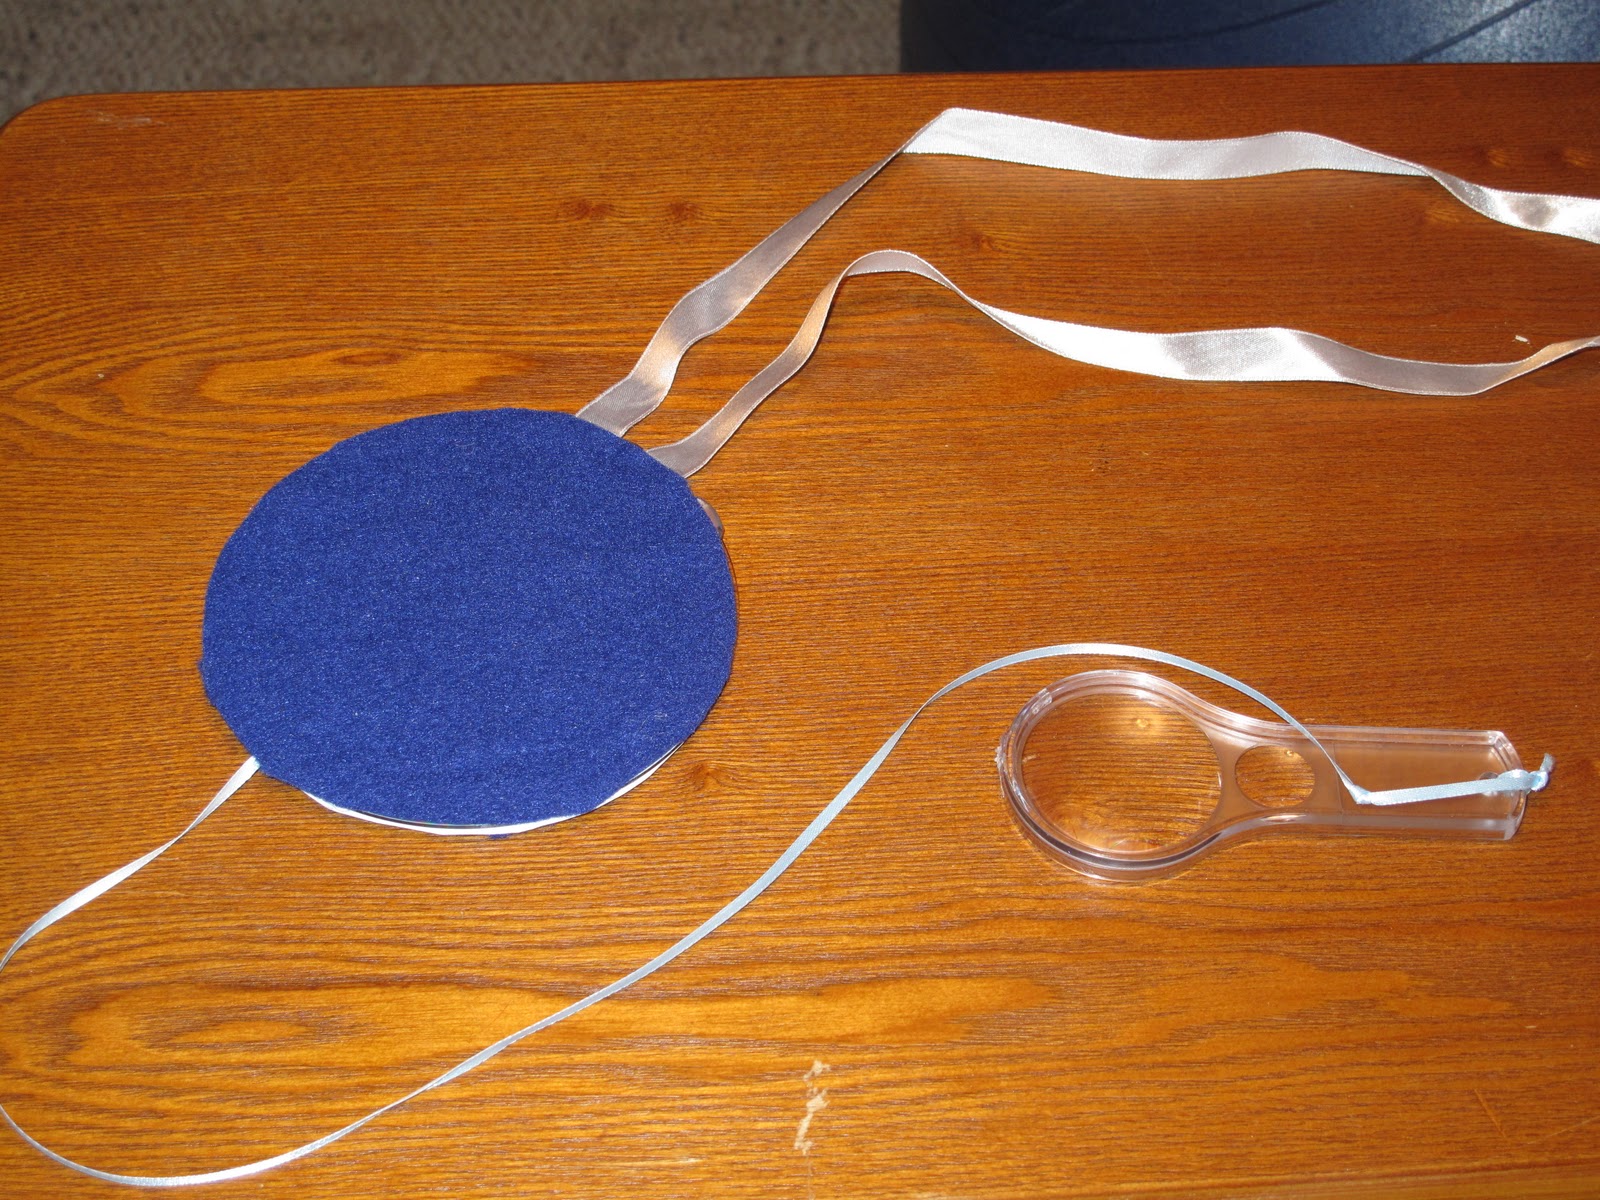
Building Our Descriptive Words using the “Mystery Box” “We’ve been learning about our sense of Touch. We are going to use our sense of touch to figure out what is in our Mystery Box.” We will do the mystery box each day during the time we are exploring our senses (or as long as it’s interesting). Use common objects from the classroom that would be easy to identify: ball, train car, paint brush, bell, cookie cutter, dollhouse furniture, thick crayon, mini binoculars, plush owl, and a block.            To make the Mystery Box I took a medium sized coffee can and stretched a black knee-high nylon on the top. It held on great and the kids could reach their hand all the way inside to feel the object but could not pull it out! The nylon was dark enough that they couldn’t see the object either!


Tactile Letters, Names or Sight Words – depending on what your children are working on, you could create either sand paper letters or words. Use white glue and play sand to make each child’s name, letters, or sight words.


Writing CenterRubbings– cut out a variety of shapes from cardstock, paper doilies, or sandpaper. For young children, tape the shapes to the table so it won’t shift. Show the children how to place a piece of thin white copy paper over the shapes and rub with a thick crayon. (Note: the tape does show up in the rubbing, so if the children have the dexterity to hold the paper down without tape, the results might be better.

These types of rubbings are great to do throughout the year – we explore leaves, cloud shapes, geometric shapes, hearts, egg shapes, and a variety of holiday shapes. This builds fine motor skills and is often exciting for children as the mystery picture is revealed!

Art Projects

img_3474

Sensory Texture Painting – put tempera paint in paint cups and add one of the following to each cup: coffee grounds, crumbled leaves, coarse salt, and sand.

Since this paint is thicker, you might want to use it to paint onto card stock, recycled cereal boxes, or corrugated cardboard. While painting, encourage the kids to use descriptive words for how the paint feels & what they see.

Paint in groups at the table to encourage dialogue between students! You could also provide a variety of things to use as paintbrushes – sponges, toothbrushes, cotton balls, forks, toothpicks, pipe cleaners, and Popsicle sticks to make their own special textures.

img_3488

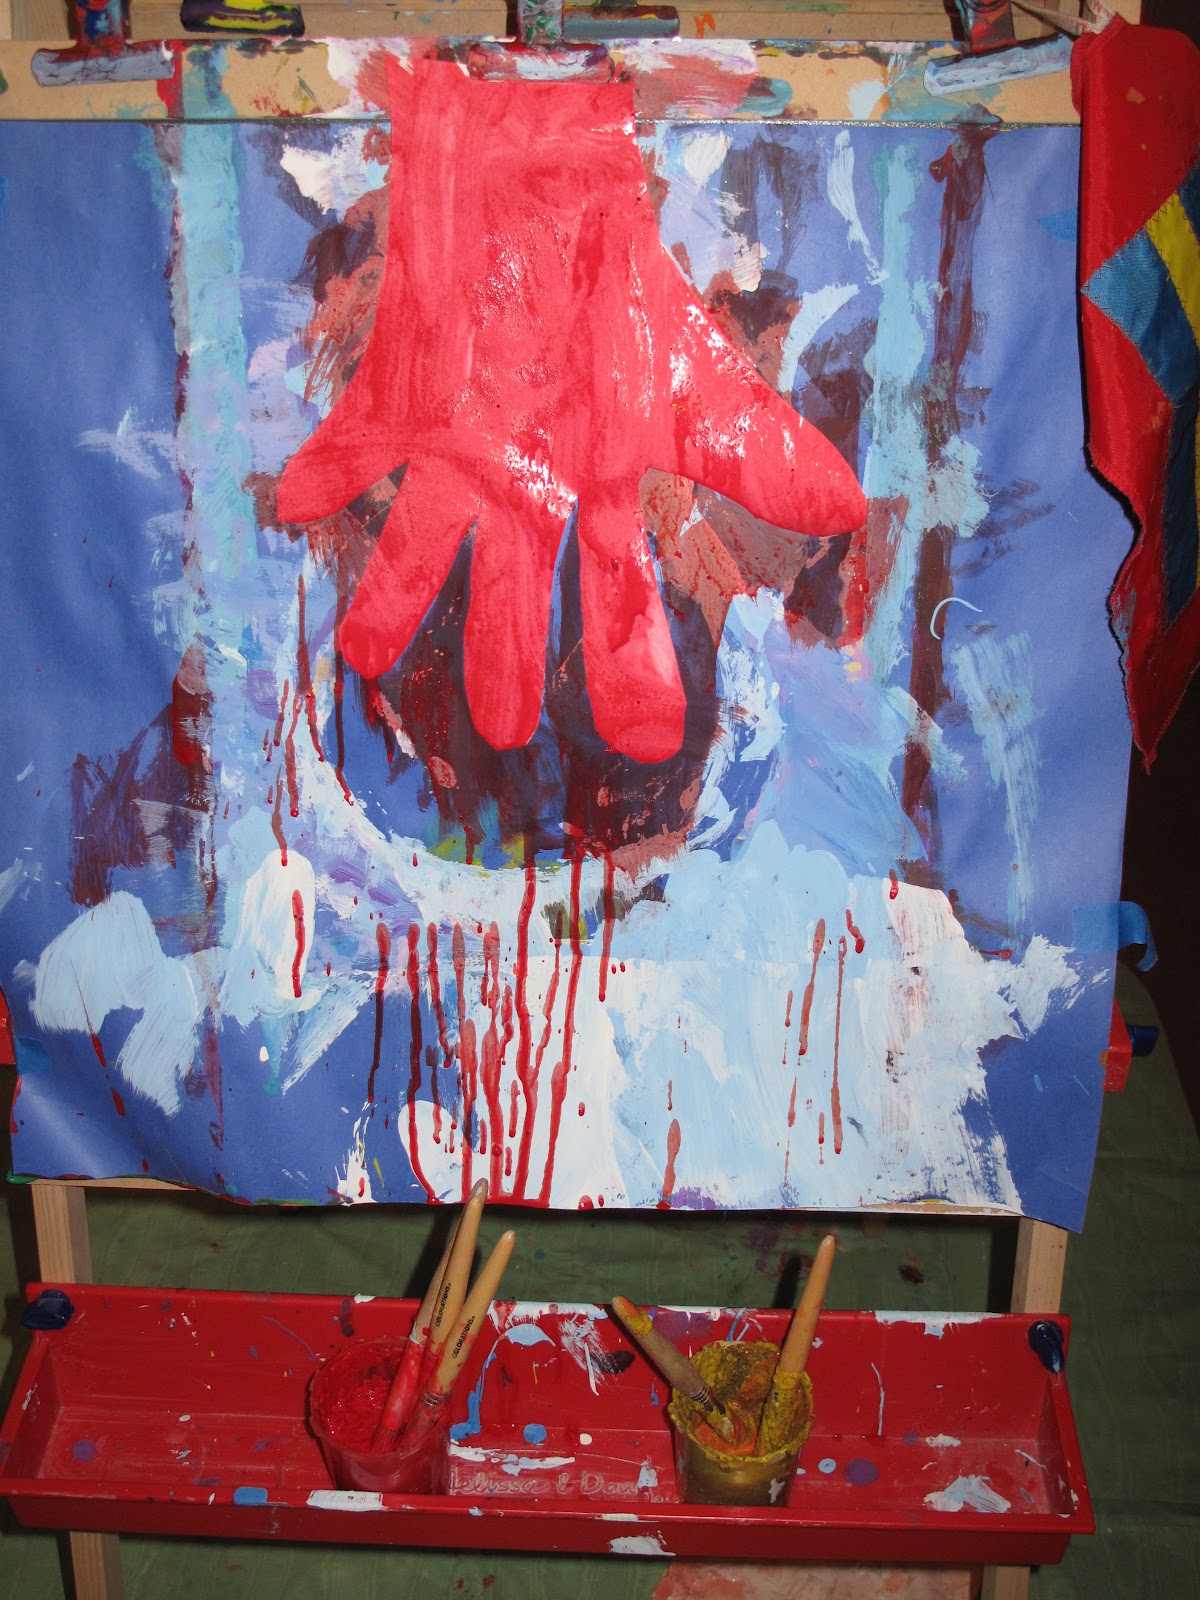
Easel painting – open the easel after the art project at the tables is done, use the same paint cups with textured paints. Cut out the shape of an over sized hand for the kids to paint! (Granted, the red paint looks a bit creepy dripping down. Think I’d offer a variety of colors next time.)

Finger Painting: What’s the best way to explore the sense of touch…FINGER PAINT! Offer the three primary colors and slick finger painting paper, and then watch the fun exploration begin!

img_3467

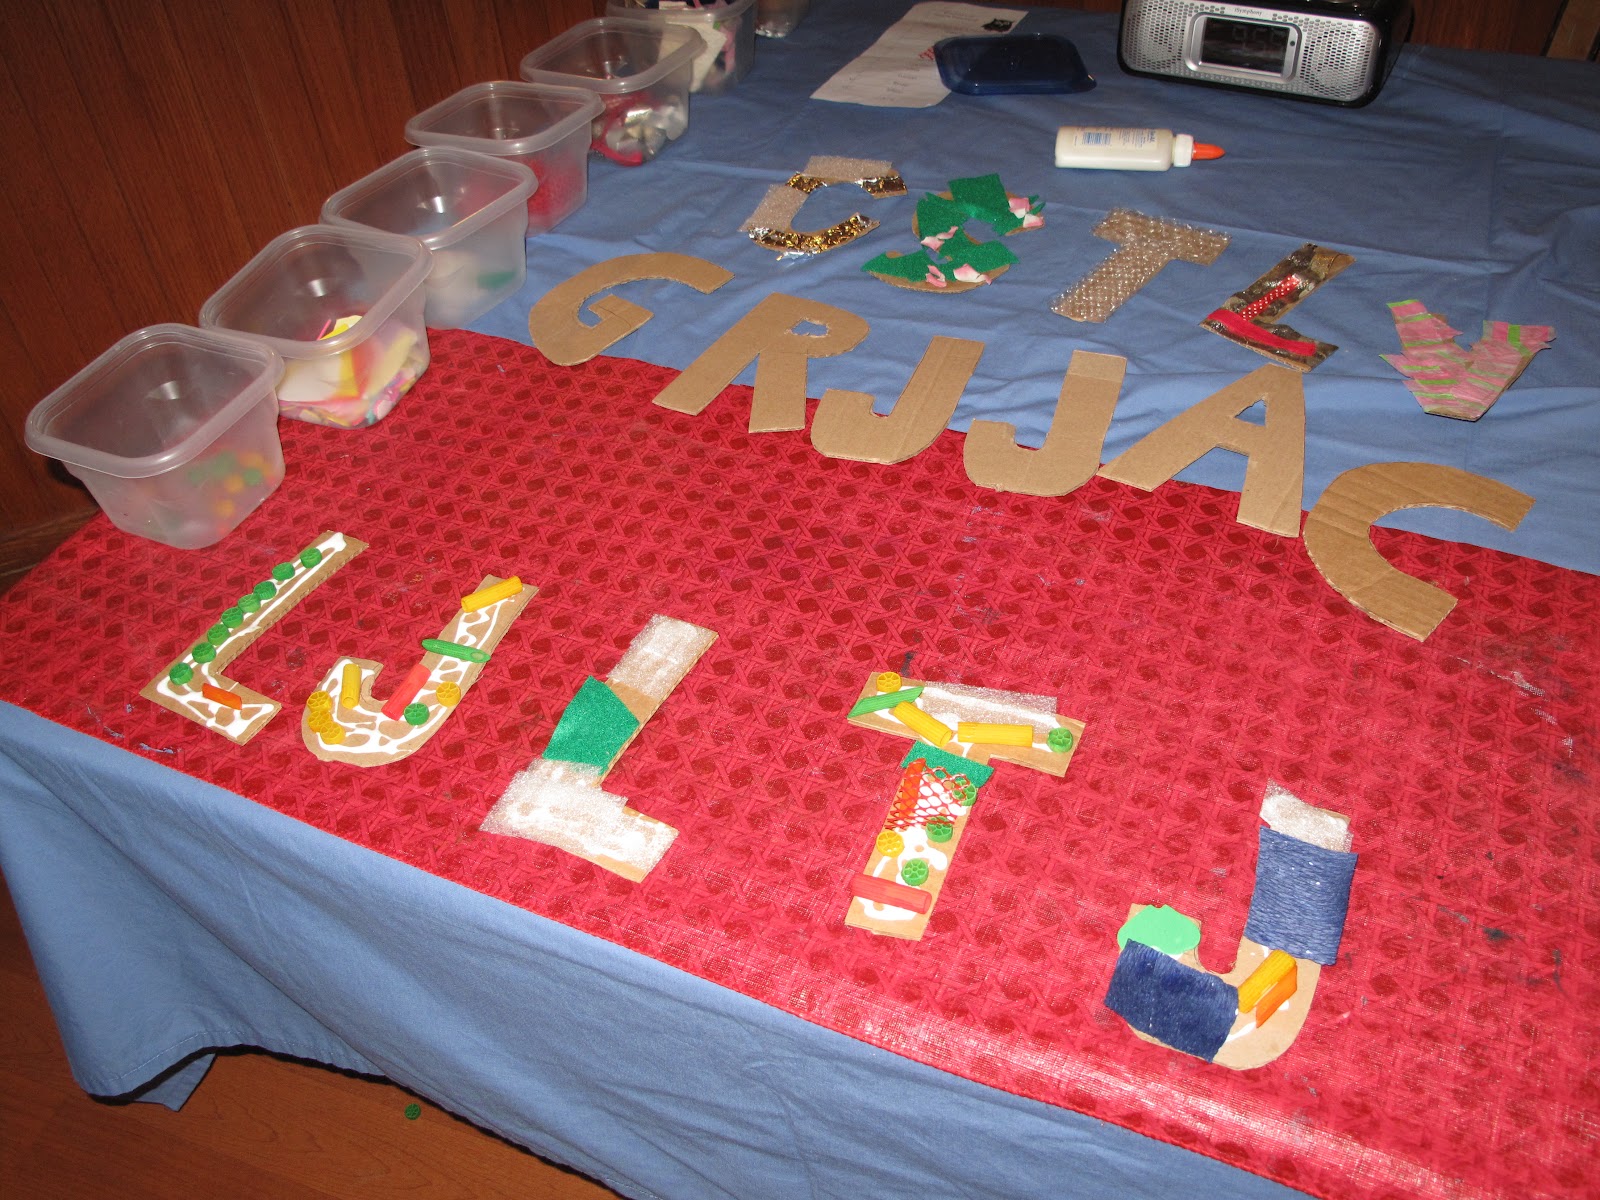
Textured Alphabet Letter Boards: give each child a small piece of corrugated card board that is cut out in the shape of their first initial. Lay out a variety of materials: sand paper, aluminum foil, lace doilies, cloth, string, curling ribbon, crinkled gift bag stuffing, cotton balls, painted paper scraps, etc. The children paint on watered down glue and select items to make their own textured board. Display them on the bulletin board. (Perhaps make an entire alphabet to display in your classroom!)
Fine Motor Skills

Draw on Your Partner’s Back – explain to children that they are going to use their finger to draw a simple shape on their friends back and then the friend guesses the shape.

Princess and the Yarn – place a short piece of yarn under several sheets of copy paper. Have the children try to find the yarn and trace it with their finger. Then peek under the paper to see if they found it in the right place. (If this is challenging, try it with just one sheet of paper at first or use tracing paper which is slightly transparent.)

Sandpaper and Yarn – show the children how to use small pieces of yarn to ‘draw’ on the sandpaper. The yarn sticks to sandpaper so their picture will stay without any glue or tape.

Play Dough Center 

Cloud Dough: Mix 8 cups of flour and 1 cup of vegetable oil in a large bin. This is a wonderful texture for the children to squish, mold, and play with!

DIY Play Dough Tools: Have the children help you create popsicle sticks with a variety of materials glued on such as beads, buttons, large sequins, fuzzy sticks, and glue designs. Once the materials are dry, have the children add them to the play dough to explore what types of imprints are made when the sticks are squished into the dough.

Nature Texture Impressions: offer a several natural materials for children to squish into play dough to explore textures

Clay vs. Play dough: children who have never played with clay before will be surprised how hard it is to squish and mold. Compare clay to play dough and talk about the differences in texture.

Water Table

Nature Stew: a fun way to explore textures is to gather some materials from outdoors and add them to the water table – flowers, leaves, pine cones, rocks, and bark all offer great exploration and imaginative play for making stew! Offer a ladle, bowls, and some soup spoons too!

Dissolving Salt: Salt has a great texture to examine, especially when you have a variety of coarseness to explore. Offer some small containers, water, and spoons for the children to try to dissolve the salt.


Warm Water vs. Cold Water Test – in the middle of water table put a medium sized bowl with very warm water. In the rest of the table, add cold water a few ice cubes and several large ice blocks.

Sensory Play

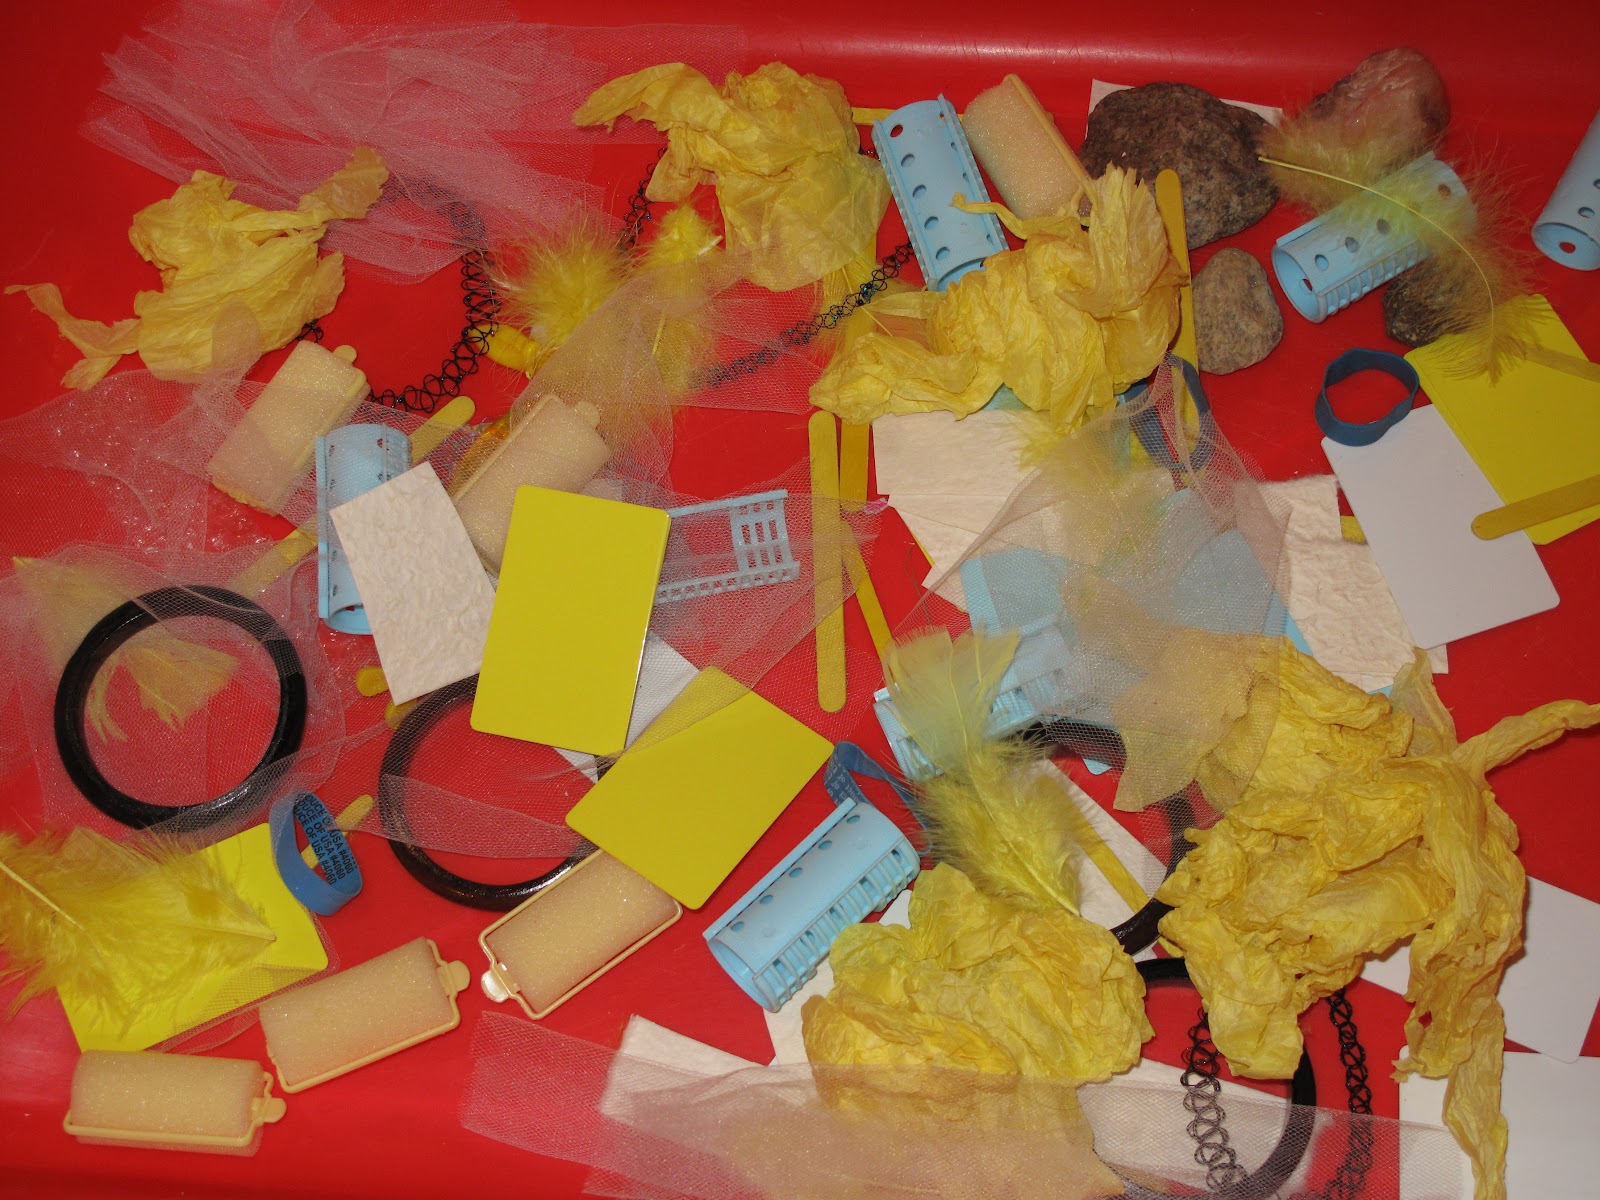
Sensory Texture Bin: wide selection of objects that have various textures (Soft: feathers, tulle, foam curlers, tissue paper balls. Hard: wooden bracelets, plastic curlers, rocks, popsicle sticks, plastic credit cards. Stretchy: plastic necklaces, rubber bands. (For this bin I also kept the color scheme to yellow, blue, and white since I will use the same materials for our SIGHT theme. That day we will sort objects in the bin by color.)

img_3486

Cooked spaghetti: I don’t use food often for play in my classroom, but the explore the texture of cooked spaghetti is quite fun when exploring the sense of touch. I like to cook two boxes and then divide it into six bowls. For each bowl I use food coloring to make the colors of the rainbow. As the children play with it, the colors all get mixed up.

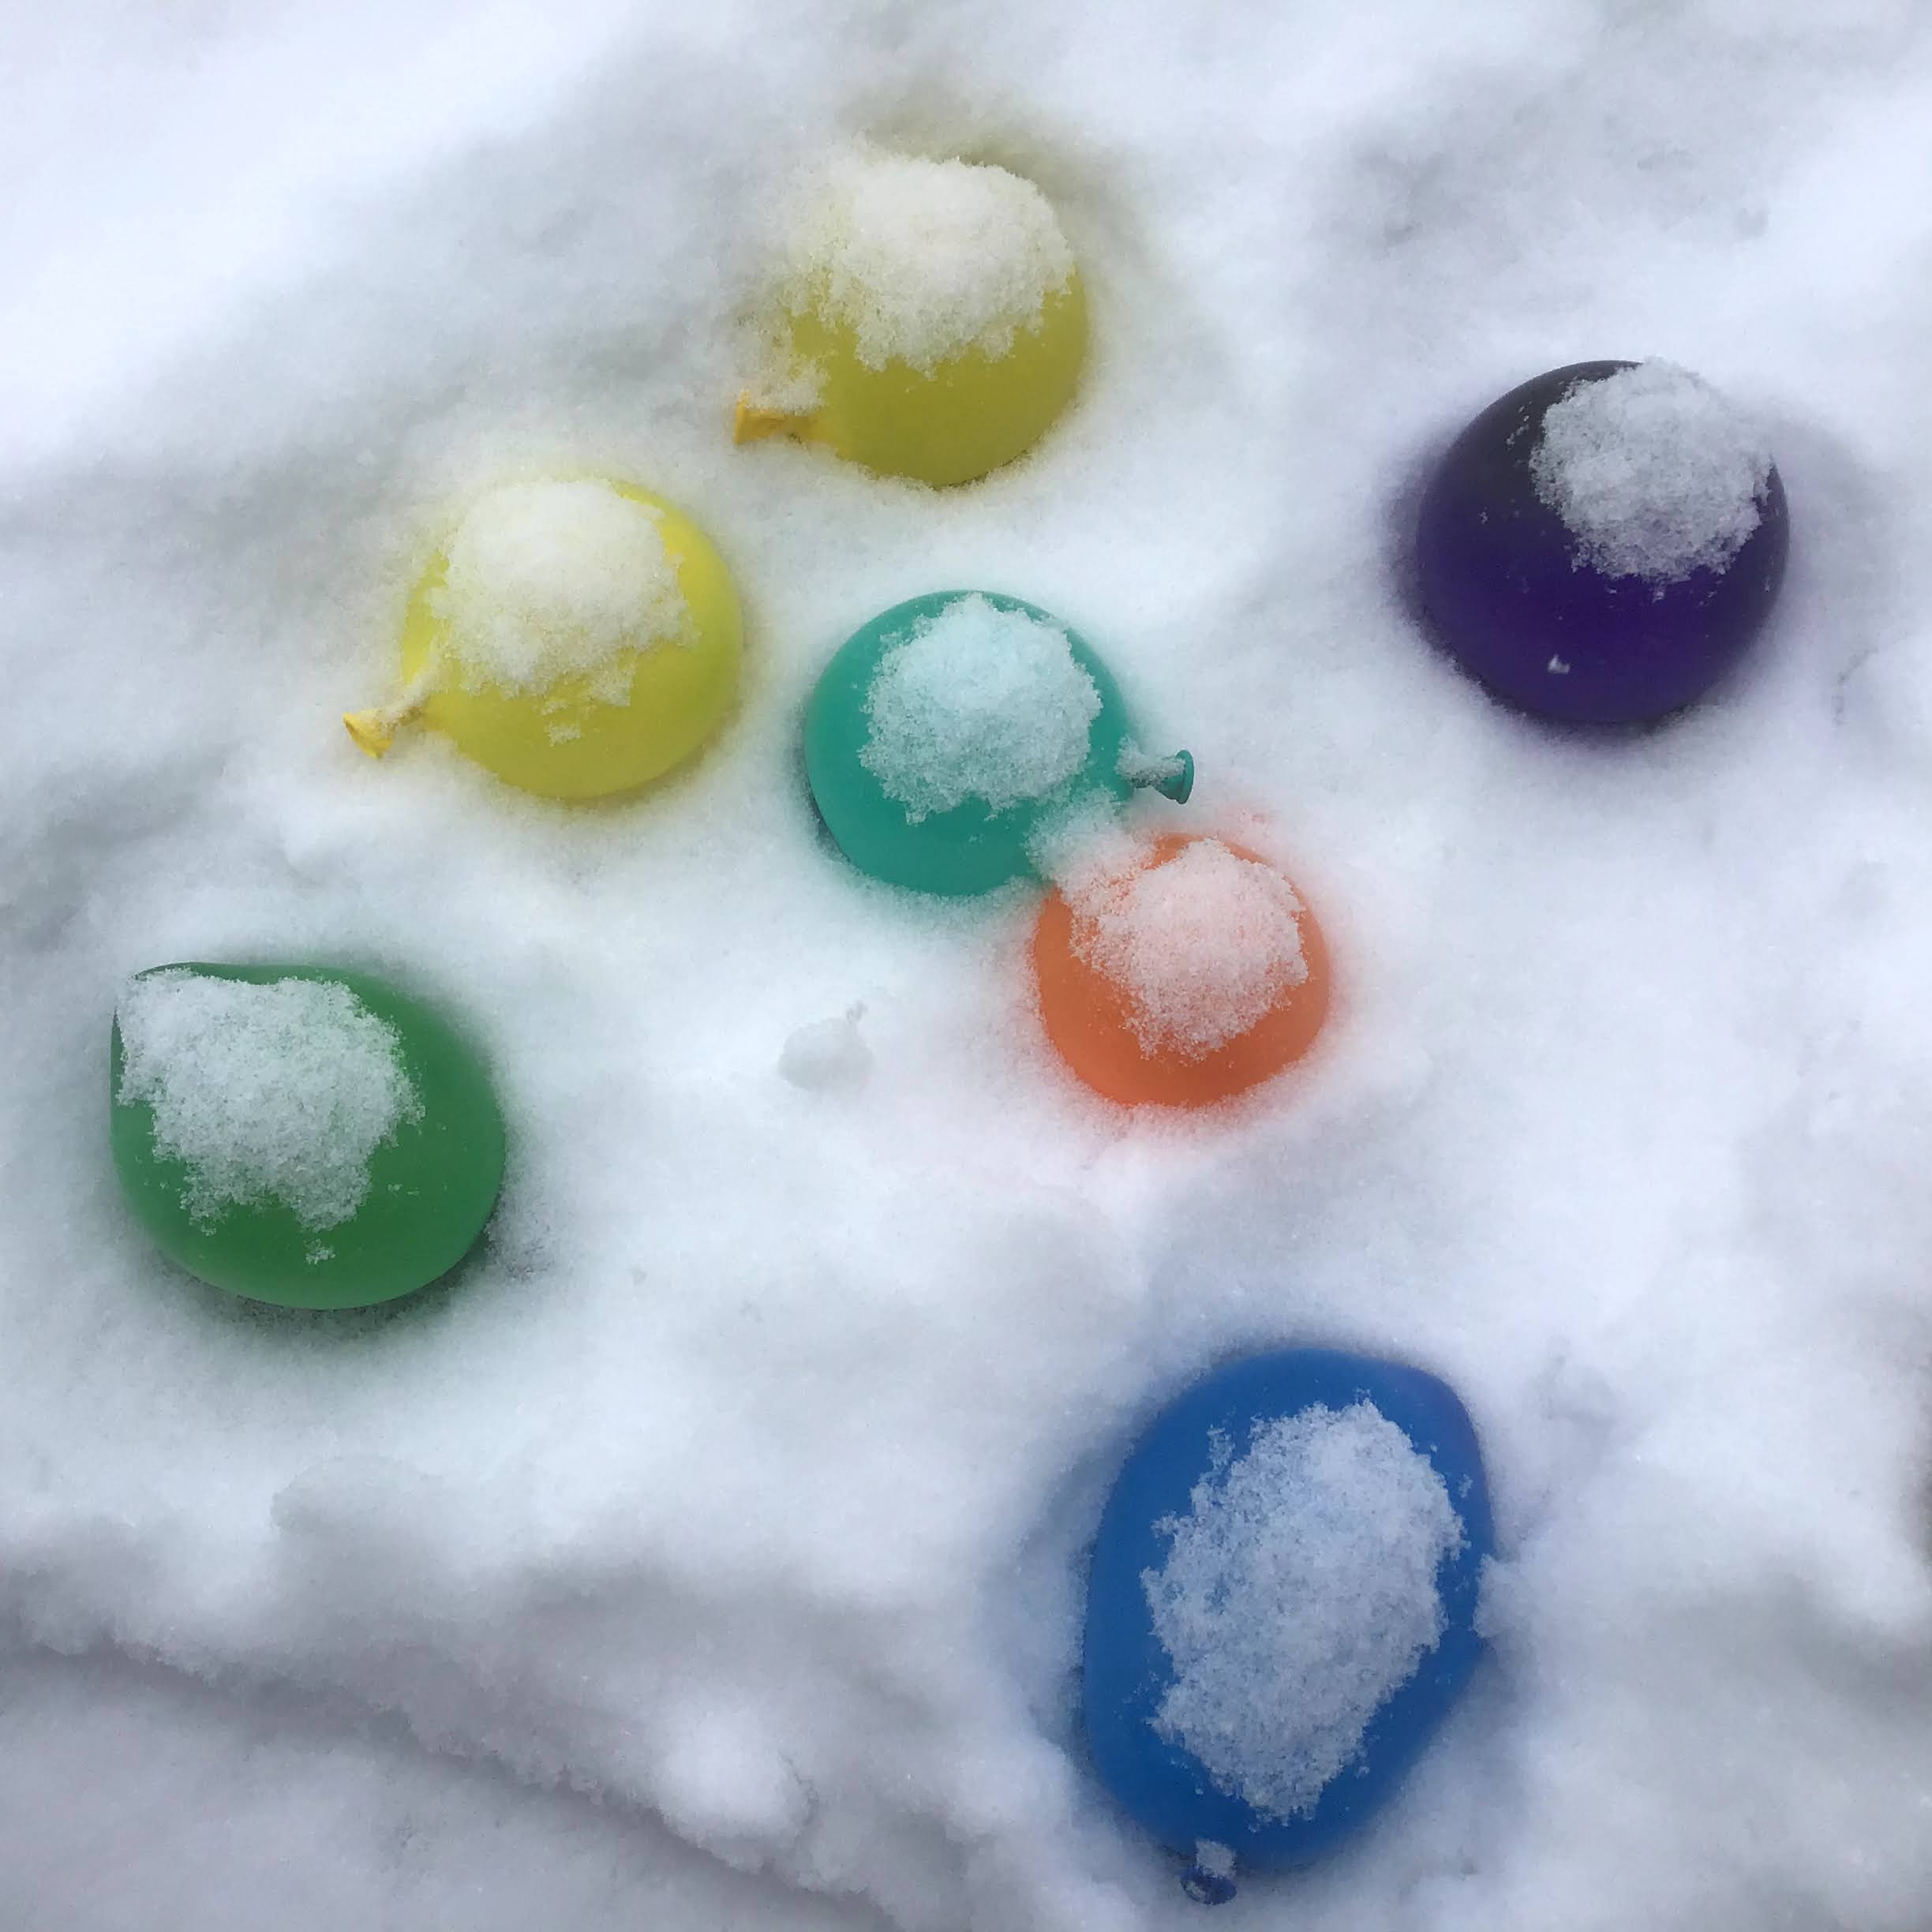
Sensory Bin Base Materials that are Non-Food Items: shredded paper, pea gravel or aquarium gravel, snow, ice cube, pom poms, cotton balls, yarn, buttons, silk flowers, sand or colored sand, salt, dried herbs, and pinecones. Of course there are endless choices, so use what you have!

“Mess Free Paint Bags”: Seal gallon sized Ziploc bags with different colored tempera paint. Encourage mark making, name writing, and picture drawing in the bags. These are also fun to explore by taping to a window or patio door, since the light makes different effects on the paint.

Texture Tray: use a compartmented tray (like a veggie tray) – put out a variety of objects and help the kids sort the objects by similar texture (aluminum foil, sand paper, onion bag, feathers, double sided tape, salt dough ornament, sock, felt, cork, dried herbs, bark, pine cone, leaves, sponge, silk, and construction paper.)

Soft & Hard Sort Bins: using the same objects in the sensory texture bin, have students sort by soft/hard.
Blocks & Building

Adding fabric to the block center is a great way to offer a different texture to explore. Also offering a variety of small world play props such as plastic animals, wooden people, or metal cars can add variety as well.


Math Activities

Children need hands-on manipulatives to learn early math skills. Offer them a variety of natural materials such as shells or rocks to give them a different experience than the plastic teddy bear counters.

Play dough Math Mats: children can create snakes to form their numerals, and create little balls to match the number. Google “play dough math mat” for free printables to add to your play dough center!

Textures Numerals: create numeral cards by using white glue and sand, these cards can be kept with the math materials for children to feel.

Sand Tray Numeral: Provide a shallow tray of sand and numeral cards for the children to copy in the sand

Dot Mats – draw the numeral and matching number of dots, then the child uses pebbles to put on the dots to match the numeral.


Bulletin Board Ideas                   

In the Science Center section, I mentioned making “Texture Collage Boards” as a home/school project. Instead of putting these at the science center, create a “Texture Wall” as a fun collaborative bulletin board full of different textures for the children to touch and explore!

Thematic Healthy Snacks

Texture Snack: Ask families to send in snacks that have various textures. One year my preschoolers were shocked to find out that they loved seaweed and some only tried it because we were doing a texture investigation at snack time!

Mealtime: “What textures do we have on our plates?” Bring the children’s attention to the foods we serve and name the textures. These conversations boost their vocabulary and may also get them to try a food that they haven’t explored yet. “I spy a food that is crunchy!”

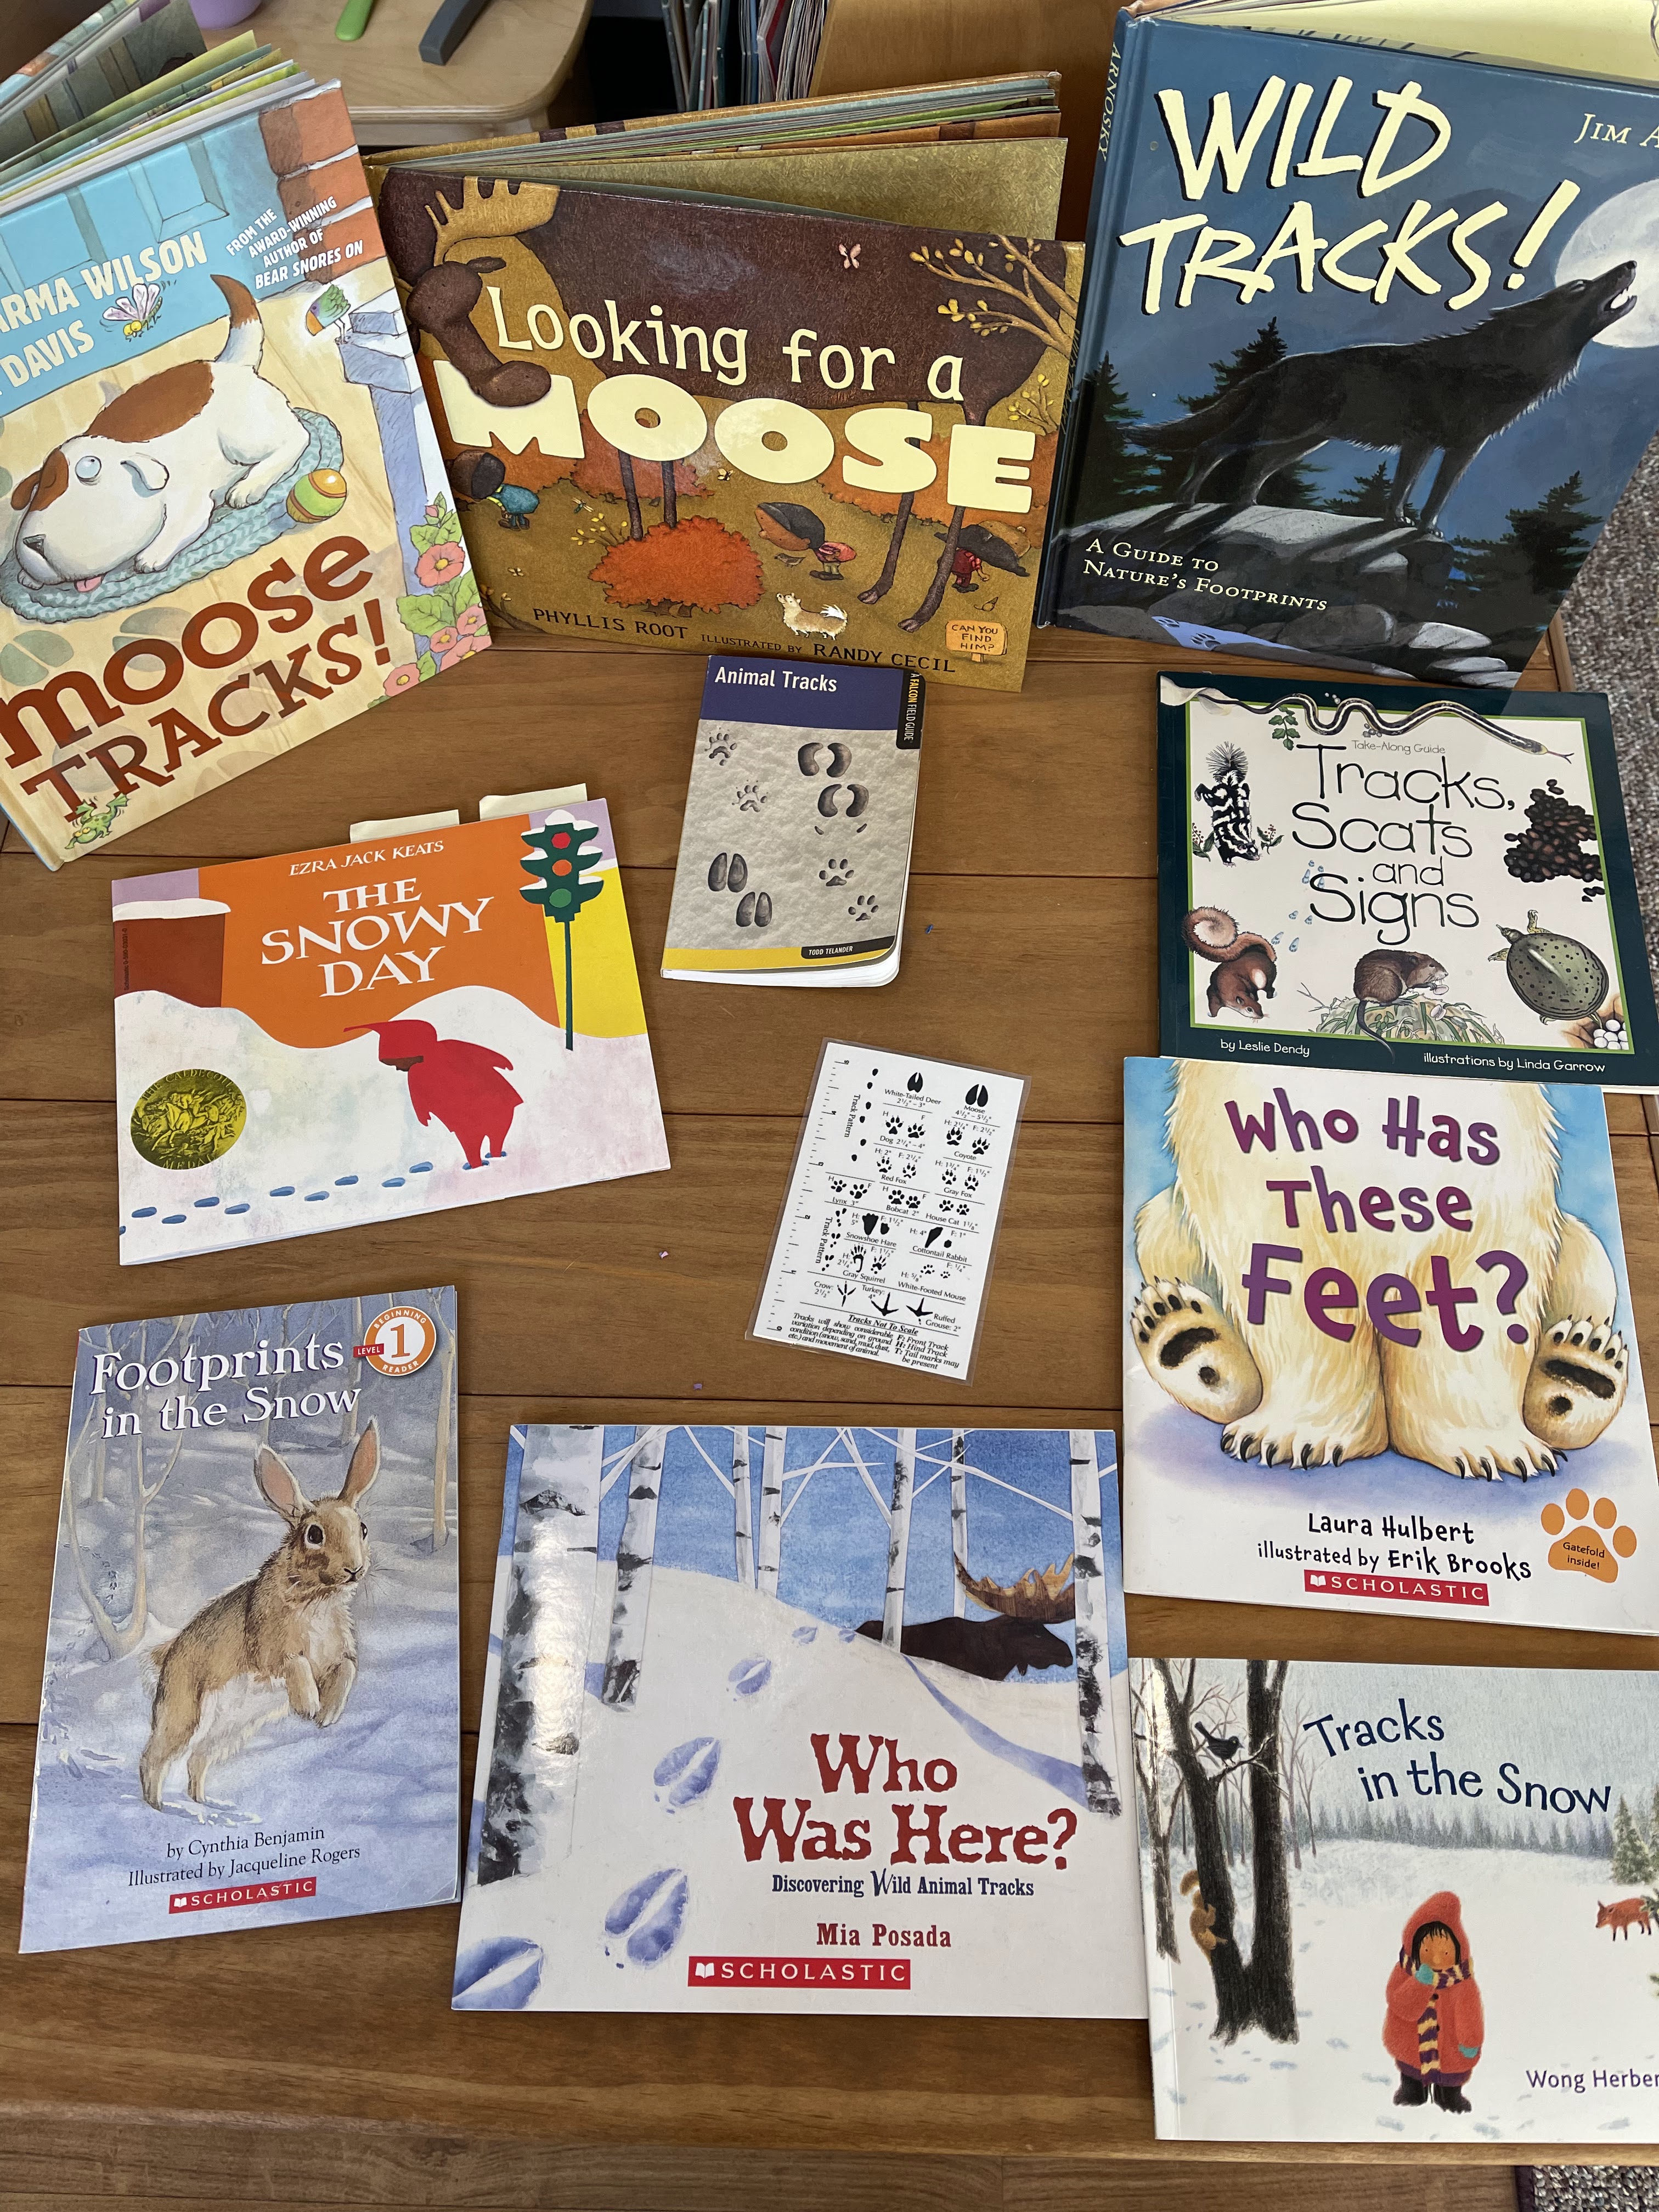
Books for teaching about Touch:

I Touch (Baby Beginner Board Books) by Helen Oxenbury

Quack! Quack! A Touch and Feel Book by Lousie Rupnik

Soft and Smooth, Rough and Bumpy: A Book About Touch by Dana Meachen Rau

Spiky, Slimy, Smooth: What is Texture by Jane Brocket

The Princess and the Pea by Carol Ottolenghi

Touch & Feel books

Touch (Five Senses Series) by Maria Rius

Touching (The Five Senses) by Rebecca Rissman

What I Touch (My Five Senses) by Alex Appleby


Check out my Pinterest board for even more Five Senses teaching ideas!


Sensory Exploration: Hearing

There are so many wonderful ways to explore our sense of hearing!

IMG_0642

Outdoor Exploration: “Listening Walk” – guide the children in becoming still, closing their eyes, and listening for sounds for 20 or 30 seconds. Then try for 1 minute. Go longer if they are attentive. When my daughter was two she loved to play this game on our walks…mostly because we had lots of woodpeckers and she was an expert at hearing and then locating them! We would walk through our woods and stop and listen for sounds. She loved to be the first to point out a woodpecker or identify another sound in nature! Before going on the sound walk, read aloud the wonderful book The Listening Walk by Paul Showers.

“Bird Sounds” – encourage children to listen to the birds in the outdoors, try to see if you can figure out where the sound is coming from, and if possible, identify the bird. Young children enjoy mimicking the bird sounds, though their enthusiastic crow calls might scare off the rest of the birds! To learn more about bird sounds, consider downloading a bird call app and learn many of the bird calls in your area!

Try setting up some bird feeders outside your windows for the children to observe and listen carefully to their sounds. Children soon discover that the quieter they become, the louder the birds will become!

IMG_0691

“Echo Game” – explain to the children what an echo is, and then have them echo some sounds or words that you make. Then the children spread out throughout the play space and you echo the sounds that each other makes. Pick someone to be ‘IT’ and then they pick the next child to be it. Try spreading out and seeing how it becomes more difficult to hear when the children are farther away.

“Listening to the Creek” – explain that the creek makes different sounds depending on the season. What does the creek sound like today? How would it be different in another season? We have discovered that at times it’s a quiet trickle and others a loud rushing ‘river’, and at other times the water actually runs underneath the ice and creates a muffled sound. Oh the opportunities to learn vocabulary in nature!

IMG_0655

“Outdoor Sound Wall” – in the outdoor play area, create an interactive sound wall by hanging a variety of old pots, pans, metal lids, plastic containers, bells, wood blocks, different lengths and widths of pipes, hollow tubes, PVC pipes, and anything else that makes interesting sounds! Provide mallets or sticks for the children to use to create sounds. *Check Pinterest for additional ideas in creating a sound wall!

Gross Motor Games: “Follow that Noise” – the adults in the room each have some sort of noise maker in their pocket. The adults spread out, kids close their eyes, and one adult makes a noise. The kids are told to open their eyes and walk to the adult who they think made the sound. Once there, the children try to guess the sound. (Try: cricket clicker, jingle bell, keys, clap, snap, etc.)

              “Bells on Boots” – tie a jingle bell onto each child’s boot laces. Then have the children dance, hop, stomp, and walk around the room or yard. Try a game of hide-and-seek with the bells on and talk about why it’s easy to find other kids when their bells shake.
An easy way to make these is to use small jingle bells, thread a twist tie through the hole on top, and then twist onto shoe laces. I find if you put the bell on the child’s zipper pull they will hold it and muffle the sound…which could be a whole other type of learning.

Bubble Wrap Walk” – lay down a large section of recycled bubble wrap for children to run and jump on. What sounds do we hear?!


Dramatic Play: add instruments and dress up clothes and props so children can pretend to be musicians. Perhaps 80s Rock Stars?!

Science Center: “Sound Station” – create an interactive set of noise makers that the children can explore. Some ideas include: set of hand bells, clear rain stick, toy cell phone, cat “meow” or cow “moo” toy that makes sounds when you turn it upside down, toy microphone to amplifies, wooden or metal xylophone, wind chimes, jingle bells of various sizes, and a stethoscope. The sound station is usually of high interest but monitor the noise volume so it isn’t disturbing other children in the classroom.

Guided Activity – “Matching Sound Eggs Game”: Make two each of the sound eggs (plastic Easter eggs) before the children arrive. Children shake them and try to find the two that match. Contents include: dry beans, coins, corn kernels, salt, cotton balls, and paper clips.
Another option would be to use one container that was see-through and one that was not. Then the kids would have to match the sound but wouldn’t have to open the containers.

One year, we took our ‘sound eggs’ outside to play a version of Hide and Seek and “Matching Sound Eggs Game” together. Children come up with the best games don’t they!

IMG_1556

Music: Listen to a variety of world music and try to identify some of the instruments. Compare the sounds to the instruments you have in class. Sing a song or chant a poem using an echo. One of my favorite echo songs to sing is “Down By the Bay”.

Fine Motor Skills: Instruments provide many new fine motor skills for children to explore. If possible, bring in a variety of instruments for children to strum, pluck and drum on. Practice using a mallet on tambourines, chimes, or xylophones. Boisterous jam sessions with a wide variety of percussion instruments build fine motor skills and teach about sound. Ask the children, “Can we make soft sounds, loud sounds, gentle sounds, wild sounds, etc! A keyboard with headphones is one great way for children to play without disturbing the rest of the group.

Language and Literacy: depending on the age of the children you are working with, there are a wide range of phonological awareness activities that you could incorporate into your “Hearing” activities. Check out the wonderful U.V.A. website for hundreds of activities for teaching Phonological Awareness including beginning sounds, blending, rhyme, and sound to letter segmentation! https://pals.virginia.edu/tools-activities.html

Writing Center: my preschoolers love using paper crimpers to make textured papers. I have a set of three crimpers and we discovered that each one makes a different sound! Another way to bring sound to the writing center would be to tie bells onto markers and pencils and children will create sound as they write!

Art Project: Rain Sticks using paper towel tubes that have tape on one end, let the children fill their tube with dried beans using a wide mouth funnel. Then the adult helps close the other end with tape. Paint, collage, or draw onto the paper tubes. Later add mod podge to make them more durable. If you are making these with just one or two children, you might consider poking toothpicks or pieces of popsicle sticks into the sides of the tube so that the ‘rainfall’ is even more pronounced! Just be sure to cover with felt or card stock so the sticks don’t pop back out.
Play Dough Center: Muffling Sounds with Play Dough – show children how to add beans or pebbles to plastic eggs. Compare the sounds of the eggs when one is covered in play dough and one is left plain. Why are there different sounds?            Sound exploration with play dough – what else could we add to this activity to explore different sounds? Small jingle bells, metal washers, dried seed pods, etc.

Water Table: add objects that make noise. Take a variety of clear plastic containers and fill them with various objects (dice, sand, rice, mini jingle bells, beans, and cotton balls). Seal them with electrical tape and ask the kids to keep them sealed. Kids can scoop them out of the water and shake them. Making matching pairs would be another fun idea!
Sensory Table– dried beans as base, small container (plastic & tin) for the kids to scoop and fill, and then close to make shakers. One another day try adding a variety of crunchy & noisy objects – cellophane, wax paper, bubble wrap, painted paper.

Blocks & Building – add a few hand bells to see if children incorporate them into their building.

Math Activities –there are many ways that we can integrate exploring sound and learning math!

       Clapping Patterns – children can working on repeating simple patterns by echoing the clapping and tapping patterns that the teacher makes. Begin with an easy pattern, such as “Clap, tap, clap, tap.” Encourage children to follow along, then ask a student to create a new pattern to copy. (Use as a transition activity!)

       Count My Claps– explain to children that you want them to use their ears to count, so they need to close their eyes. Then clap a couple of times and ask children to show with their fingers how many claps you made. Practice with small numbers and then work towards larger numbers. Use instruments such as a drum or xylophone to count the beats!

       One Duck Stuck – read the story “One Duck Stuck” by Phyllis Root and explain to children that they will help with the refrain, “Help, Help, Who Can Help?” and the other refrain “I can, I can”. Then practice verbally counting to 10 as the number of animals increase on the pages. After reading, use plastic animal counter to reenact the story. This book naturally lends itself to active participation with its excellent rhythm and is a great book to work on counting skills!

     Guess My SoundWith their eyes closed, the adult makes a sound and the child guesses what made the noise. Try: clap, stomp, pretend sneeze, snap, whistle, cough. Instead of guessing the sound the kids could mimic the sound.


Family Connections: Encourage families to play a CD or recording of common sounds and then have the children guess the sounds. Create their own recording using a tablet or phone while outside and then have another family guess what the sounds are!


Thematic Healthy Snacks: Bring in an air popper and make fresh popcorn with the students. What sounds do we hear as the snack is popping?!                                                          


Circle Time Learning – Show a picture of the inside of the ear & explain briefly how our ears work. One important thing about our sense of hearing is learning how to change the volume of our voice, especially when we are indoors. Can you show me your indoor voice, how about your whisper voice, and your outdoor voice? Read aloud, Listening Time by Elizabeth Verdick (explains how to be a good listener at rug time) and reinforce how our sense of hearing is important in being a good listener, especially at circle time!

Online Resources for more ideas about Sound & Hearing:          

Sound cups activity & kids making their own sound cups:  http://www.playbasedlearning.com.au/2010/08/sound-cups/

Water & Music Play
http://childsplaymusic.com.au/2012/01/17/water-play-music-play-children-a-natural-combination/

Books for teaching about Hearing:

Hearing (The Five Senses) by Rebecca Rissman

Hearing Things by Allan Fowler

Listen, Buddy by Helen Lester

Listening Time by Elizabeth Verdick (explains how to be a good listener at rug time)

Mr. Brown Can Moo, Can You: Dr. Seuss’s Book of Wonderful Noises by Dr. Seuss

Polar Bear, Polar Bear, What Do You Hear? by Bil Martin & Eric Carle

Shhh…A Book About Hearing by Dana Meachen Rau

Sound: Loud, Soft, High, and Low (Amazing Science) by Natalie M. Rosinsky

Sounds All Around by Wendy Pfeffer

Sounds My Feet Make by Arlene Blanchard

The Ear Book by Al Perkins

The Listening Walk by Paul Showers

Too Loud Lily by Sofie Laguna

Too Much Noise by Ann McGovern

Who Hears? by Anne Miranda (reference


Check out my Pinterest board for even more Five Senses teaching ideas!